Ghost in a Jar Decoration: A Spooktacular Craft for Halloween Fun
Halloween is the perfect time to get creative and add some spooky charm to your home. One fantastic way to do this is by crafting your very own Ghost in a Jar decoration. This easy DIY project combines creativity with a dash of eerie fun, making it an ideal craft for Halloween enthusiasts. Whether you want to brighten up your mantelpiece or create a fun decoration for your Halloween party, this Ghost in a Jar is a simple yet eye-catching addition to your spooky décor.
In this article, we will guide you through the step-by-step process of creating a ghost in a jar, the benefits of this craft, and helpful tips for making the most out of this spooky project. You will also find answers to frequently asked questions, along with ideas for further inspiration.
Table of Contents
Ingredients
To create this charming ghost in a jar, you will need the following materials:
- Glow-in-the-dark polymer clay
- Black polymer clay
- Felt in black and orange
- Moss
- Mason jars
- Fiber fill stuffing or cotton balls
- Fishing line or clear jewelry cord
- Pony bead or another small bead
These ingredients are easy to source, and many can be found at craft stores or online. The combination of glow-in-the-dark clay and natural elements like moss and felt creates a hauntingly delightful effect, perfect for your Halloween décor.
Instructions
Follow these simple steps to craft your very own Ghost in a Jar:
- Shape the Ghost: Start by kneading your glow-in-the-dark polymer clay until it becomes soft and malleable. Shape the clay into a cute ghost by rolling it out to about 1/4 inch thick. Pinch the sides to create ruffles and gently push up the center for that signature ghostly appearance. Once you are satisfied with the shape, bake the ghost according to the polymer clay package instructions.
- Make the Eyes: Use black polymer clay to create two small beady eyes for your ghost. Poke a small hole at the top of each eye to thread the fishing line through later.
- Prepare the Base: To create the base of your ghost, take your mason jar lid and trace it on a piece of black felt. Cut out the felt circle, then glue some moss and fiber fill stuffing onto the felt to create a fluffy, mossy base. Once done, place this felt circle in the bottom of your mason jar.
- Hang the Ghost: To suspend the ghost, thread a piece of fishing line through the top of the ghost’s head. Add a bead for a touch of flair and tie the line securely. This will allow the ghost to “float” in the jar, giving it a spooky effect.
- Assemble the Jar: Carefully lower the ghost into the mason jar. Make a small hole in the jar lid, then thread the fishing line through it. Adjust the ghost’s height within the jar to your liking, securing it with tape. Place the felt circle on top of the jar, then screw the mason jar ring back into place. Your ghost is now suspended and ready to haunt!
By following these easy steps, you will create a whimsical and spooky ghost in a jar that’s perfect for Halloween. This craft is simple, yet it adds a unique touch to any spooky setting.
Benefits of This Craft
Creating your own Ghost in a Jar Decoration offers several benefits, both creatively and practically. Here are a few reasons why this craft is worth trying out:
- Enhances Creativity: Crafting your own spooky decoration encourages creativity. You can personalize the design, play with different materials, and come up with unique ghost shapes or jar arrangements.
- Stress Relief: Crafting is a proven stress reliever. The repetitive actions involved in kneading clay, assembling the jar, and arranging the decorations can help you relax and unwind.
- Family-Friendly Activity: This DIY project is ideal for families. It’s a great craft for children to take part in, and they’ll love making their own ghosts to hang in jars.
- Budget-Friendly Halloween Décor: Instead of spending money on expensive store-bought decorations, this craft allows you to create an eye-catching Halloween décor for a fraction of the price.
- Glow-in-the-Dark Effect: The glow-in-the-dark polymer clay adds an exciting element to the decoration. It’s not only visually appealing but also adds a magical glow that’s perfect for Halloween night.
Tips
- Be patient when shaping the ghost: Take your time to ensure the ghost’s shape is smooth and symmetrical. The more carefully you knead and shape the polymer clay, the better the final result.
- Experiment with different beads: You don’t have to stick with a pony bead. Experiment with different bead shapes and sizes to add variety and flair to your ghost.
- Add extra glitter for sparkle: If you want to make your ghost stand out even more, sprinkle some fine glitter onto the ghost’s body before baking. It will add a shimmering effect when the light hits.
- Use fishing line for a floating effect: The fishing line will allow your ghost to appear as though it’s floating in the jar. Be sure to secure it tightly to avoid any accidents.
- Customize the base: You can experiment with different colors for the felt and moss. Try using orange felt to make a more Halloween-themed base, or add fake spider webs for a spookier vibe.
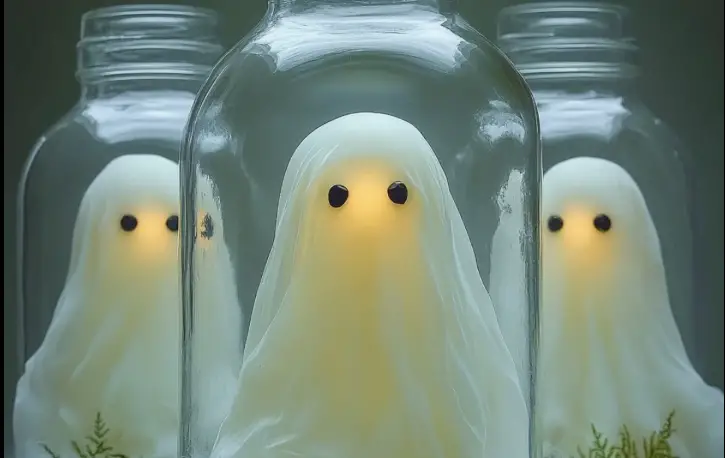
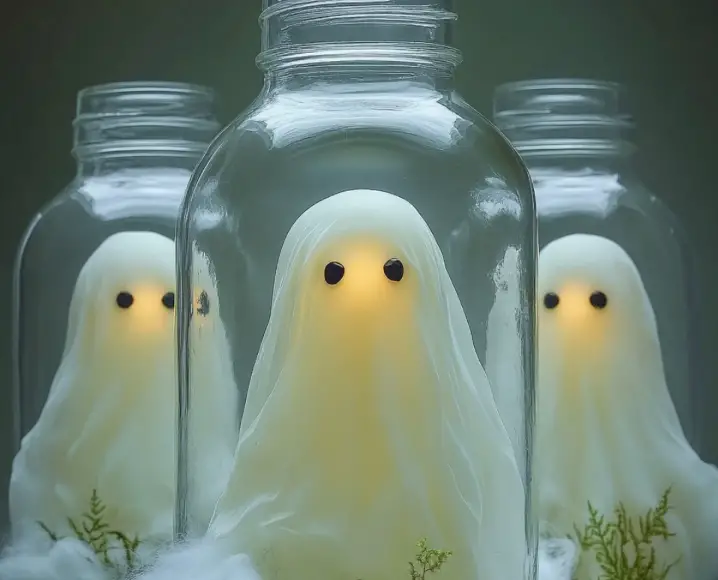
What Does It Look Like?
This ghost in a jar is a delightful visual treat. When completed, the ghost appears as though it’s suspended mid-air within the jar. The glow-in-the-dark polymer clay gives the ghost an eerie glow when the lights are off, adding a magical ambiance to your Halloween décor. The combination of the soft, ruffled ghost with the vibrant black and orange felt base makes for an eye-catching piece that brings a spooky charm to any room.
The jar, once lit in the dark, creates a hauntingly beautiful effect with its soft light and glowing ghost, making it a perfect addition to a haunted house or party.
How to Store
If you want to preserve your Ghost in a Jar decoration for the next Halloween, storing it correctly is important. Here’s how to store it:
- Keep it in a cool, dry place: Store the jar in a place that’s free from heat or moisture. This will help prevent the polymer clay from degrading over time.
- Avoid heavy stacking: To prevent the ghost from getting crushed, store the jar in an area where it won’t be squashed by other items.
- Keep the glow effect intact: To maintain the glow-in-the-dark effect, expose the jar to light during the day. This will ensure the ghost remains bright when the lights go out.
The Ghost in a Jar Decoration is a fun and creative way to add some spooktacular charm to your Halloween décor. With a few simple materials and some creative effort, you can make a unique and glowing decoration that will delight both children and adults. This craft is perfect for anyone looking to add a little handmade magic to their Halloween festivities.
For more craft ideas and inspiration, don’t forget to visit More DIY craft ideas for more exciting projects that will fuel your creativity all year long.
Frequently Asked Questions
Q: Can I use regular clay instead of polymer clay?
A: It’s best to use polymer clay for this project, as it bakes and hardens well, making it perfect for creating durable decorations. Regular clay may not hold its shape or structure.
Q: How can I make my ghost bigger or smaller?
A: You can adjust the size of your ghost by using more or less polymer clay. Simply knead the clay until it reaches your desired size before shaping.
Q: Can I add additional decorations to the jar?
A: Yes! You can add small Halloween figurines, fake spider webs, or glitter to the inside of the jar for a more elaborate decoration.
Q: Can I use other materials for the base?
A: Feel free to experiment with other materials for the base, such as fabric, ribbon, or faux moss, to personalize your decoration.
Q: How long will the glow-in-the-dark effect last?
A: The glow-in-the-dark effect will last as long as you expose the polymer clay to light. To maximize its glow, ensure it’s charged under a light source for a sufficient amount of time.