DIY Gel Air Fresheners – A Natural Way to Scent and Style Your Space
Fresh, floral, and completely customizable—DIY gel air fresheners are a fantastic way to naturally elevate the scent and aesthetic of any room in your home. These homemade fresheners are simple to make, cost-effective, and an ideal project for anyone looking to infuse their living space with clean, non-toxic fragrance. Whether you’re a seasoned DIY enthusiast or trying this for the first time, crafting your own gel air fresheners allows you to personalize both scent and style using ingredients you already have or can find easily.
Table of Contents
Ingredients
To create your own DIY gel air fresheners, you’ll need the following ingredients:
- 1 cup water (divided)
- 1 packet (0.25 oz) unflavored gelatin
- 1 tablespoon salt
- 20–30 drops essential oil (lavender, lemon, eucalyptus, etc.)
- Food coloring (optional)
- Small glass jars, mason jars, or decorative containers
- Optional: dried flowers, glitter, or herbs
These ingredients form the base of a project that combines aromatherapy and decoration. Choose essential oils based on your preferred mood or season. Decorative elements like petals or glitter add a personal, visual touch.
Instructions
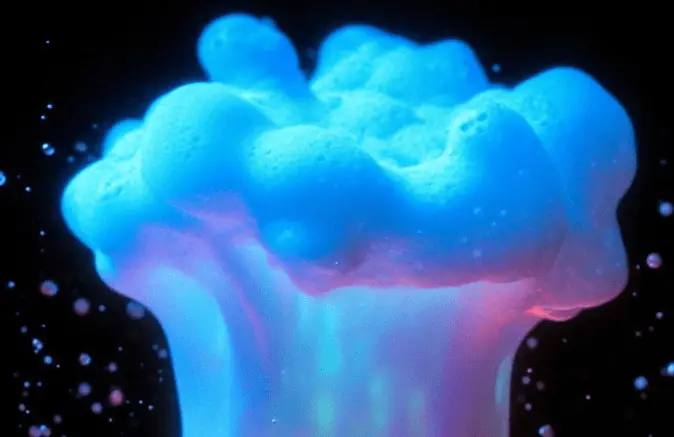
- Bloom the Gelatin: Pour 1/2 cup cold water into a small bowl. Sprinkle in the unflavored gelatin and let it sit for 5–10 minutes. This helps the gelatin absorb the water and swell.
- Heat the Water: In a separate pot, heat the remaining 1/2 cup of water until it’s nearly boiling. Carefully pour the hot water into the bowl with bloomed gelatin. Stir thoroughly until the gelatin fully dissolves.
- Add Salt: Mix in 1 tablespoon of salt. This helps to preserve the gel and prevent mold growth over time.
- Incorporate Scent and Color: Add 20–30 drops of your chosen essential oils and a few drops of food coloring if desired. This is the step to express your creativity. You can also stir in dried flowers, herbs, or glitter for an extra decorative flair.
- Pour into Containers: Transfer the mixture into small glass jars, mason jars, or any decorative containers of your choice.
- Set the Gel: Allow the jars to cool at room temperature until the gel sets completely. For faster results, place the jars in the refrigerator.
- Place and Enjoy: Once set, place your gel air fresheners around your home—bedrooms, bathrooms, closets, or even your car. Refresh or replace them once the scent begins to fade.
Benefits of This Craft
Making your own gel air fresheners comes with multiple benefits, both practical and creative. Here’s why this project is a smart and rewarding choice:
- Non-Toxic and Natural: Unlike store-bought air fresheners filled with synthetic chemicals, DIY versions use pure essential oils and safe ingredients.
- Customizable Scents: Tailor each batch with essential oil blends that suit your needs—whether it’s calming lavender, energizing citrus, or refreshing peppermint.
- Affordable and Sustainable: Most materials can be reused, and the ingredients are budget-friendly.
- Eco-Friendly: Using reusable containers and natural ingredients makes this a more environmentally conscious option.
- Fun and Therapeutic: Crafting is a calming activity that also gives you a satisfying result to enjoy or gift to others.
Tips
Here are some helpful tips to get the most out of your gel air freshener experience:
- Use Distilled Water: For longer shelf life and clarity in your gels, use distilled instead of tap water.
- Preserve with Salt: Salt isn’t just for texture—it helps prevent mold, especially if you’re using organic additives like flowers or herbs.
- Blend Essential Oils: Mix essential oils to create mood-specific aromas. Try lavender and eucalyptus for relaxation, or lemon and rosemary for a clean, uplifting scent.
- Decorate Thoughtfully: Add seasonal touches like pine sprigs in winter or dried rose petals in spring for a visual accent that matches the time of year.
- Label Jars: If you’re making multiple scents or gifting these, use labels or tags to identify each blend.
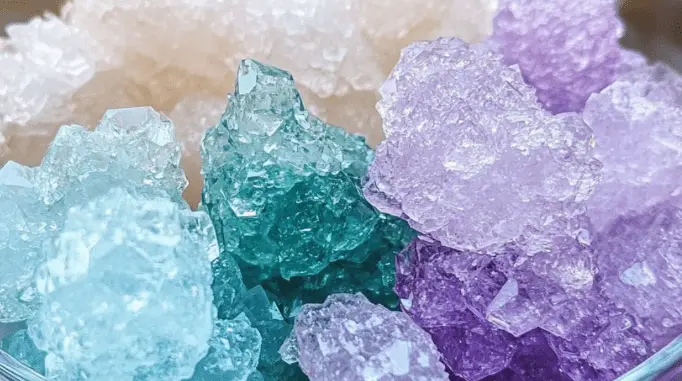
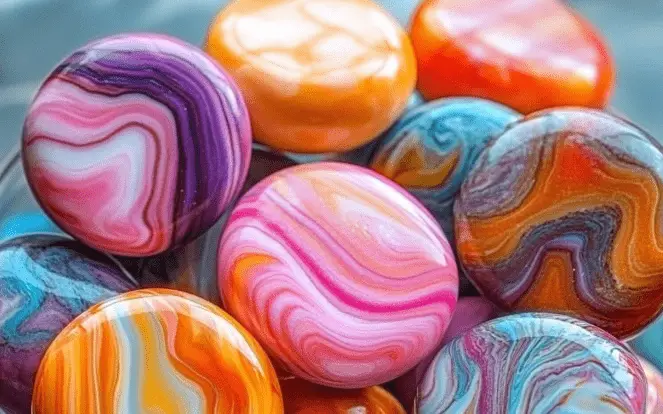
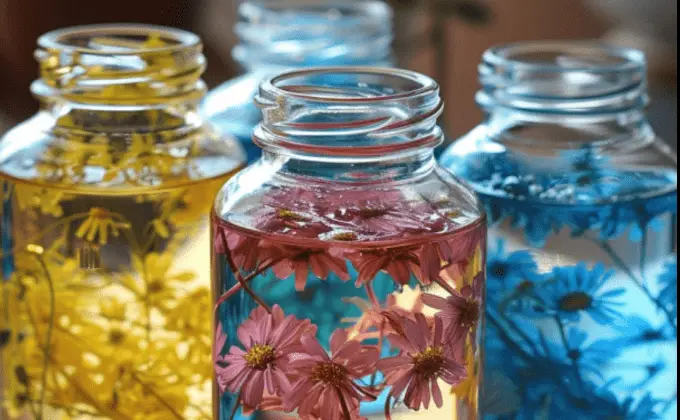
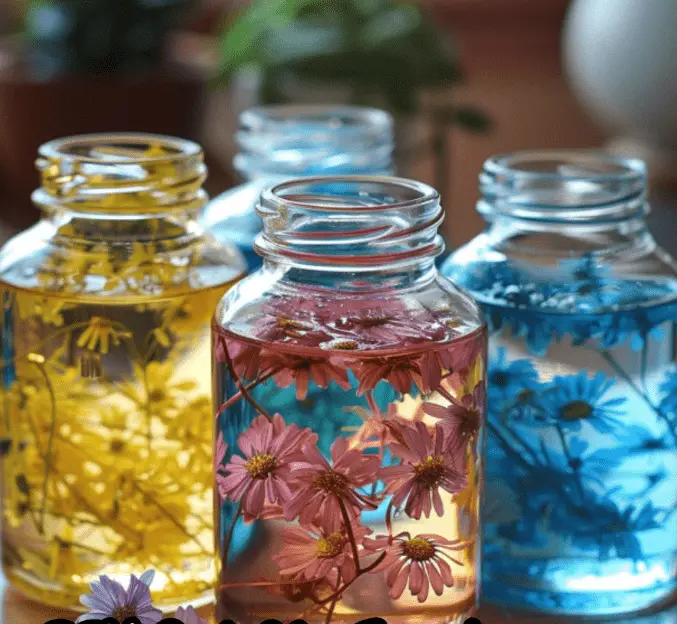
What Do They Look Like?
DIY gel air fresheners are as pretty as they are functional. The gelatin sets into a smooth, transparent base that beautifully holds added colors, herbs, or glitter in place. Depending on your container and color choices, they can range from minimalist spa-style jars to vibrant, whimsical decor accents. Placed around the home, they resemble decorative candles or mini terrariums—adding beauty while quietly working to freshen the air.
Whether you go for a soft pastel hue with lavender buds or a bold citrus color with zest and glitter, these air fresheners bring both fragrance and charm into your space.
How to Store
Proper storage will help your DIY gel air fresheners last longer and remain effective:
- Keep Away from Direct Sunlight: Store in shaded areas to avoid melting or discoloration.
- Use Sealed Lids for Transport: If giving as gifts or moving them between rooms, sealing the jars will prevent spills.
- Check for Mold: Although salt helps prevent it, if you notice cloudiness or mold growth after several weeks, it’s time to replace the gel.
- Refrigerate If Needed: In hot or humid climates, refrigerating your jars when not in use can extend their shelf life.
DIY gel air fresheners are a wonderful way to enhance your home environment with fragrance and flair. With just a few natural ingredients and a bit of creativity, you can craft personalized jars that refresh the air while acting as eye-catching decor. These fresheners are easy to make, safe to use, and a perfect blend of function and beauty.
This project is ideal for gifting, seasonal decorating, or simply making your space more pleasant without resorting to chemical sprays. From cozy bedrooms to bright bathrooms, a DIY gel air freshener can be the little touch that elevates your space.
Looking for More DIY craft ideas to inspire your creativity? Visit this link and discover more easy, enjoyable projects to try at home.
FAQ
How long do DIY gel air fresheners last?
Typically, they last between 2–4 weeks depending on the environment and the amount of essential oil used.
Can I use fragrance oils instead of essential oils?
Yes, but keep in mind that fragrance oils are synthetic and may not have the same therapeutic benefits as essential oils.
What’s the purpose of salt in the recipe?
Salt acts as a preservative to help prevent mold and bacteria from forming in the gel.
Can I reuse the containers?
Absolutely. Once a gel has expired or dried up, clean out the container and reuse it for your next batch.
Can these be used in a car?
Yes, but ensure the jar stays upright and isn’t exposed to direct heat to prevent melting.
DIY Gel Air Fresheners – A Natural Way to Scent and Style Your Space
- Total Time: 1 hour (including setting time)
- Yield: 4 small jars
Description
Easy DIY gel air fresheners made with gelatin, essential oils, and simple decor—perfect for natural home fragrance.
Ingredients
To create your own DIY gel air fresheners, you’ll need the following ingredients: – 1 cup water (divided) – 1 packet (0.25 oz) unflavored gelatin – 1 tablespoon salt – 20–30 drops essential oil (lavender, lemon, eucalyptus, etc.) – Food coloring (optional) – Small glass jars, mason jars, or decorative containers – Optional: dried flowers, glitter, or herbs These ingredients form the base of a project that combines aromatherapy and decoration. Choose essential oils based on your preferred mood or season. Decorative elements like petals or glitter add a personal, visual touch.
Instructions
1. Bloom the Gelatin: Pour 1/2 cup cold water into a small bowl. Sprinkle in the unflavored gelatin and let it sit for 5–10 minutes. 2. Heat the Water: In a separate pot, heat the remaining 1/2 cup of water until nearly boiling. Carefully pour it into the gelatin and stir until fully dissolved. 3. Add Salt: Mix in 1 tablespoon of salt to help preserve the gel. 4. Incorporate Scent and Color: Add 20–30 drops of essential oil and food coloring if desired. Stir in dried flowers, herbs, or glitter for decoration. 5. Pour into Containers: Transfer the mixture into jars or decorative containers. 6. Set the Gel: Let cool at room temperature or refrigerate until set. 7. Place and Enjoy: Use the gel fresheners in your home, closet, or car. Refresh once the scent fades.
Notes
Store extra jars in the fridge to extend shelf life. Use fine glitter or dried herbs for better visual appeal. Citrus scents are great for summer, while cinnamon or pine works for winter.
- Prep Time: 10 mins
- Cook Time: 5 mins
- Category: DIY Craft
- Method: Stovetop + Set
- Cuisine: Non-edible
Nutrition
- Serving Size: N/A
- Calories: 0
- Sugar: 0g
- Sodium: 0mg
- Fat: 0g
- Saturated Fat: 0g
- Unsaturated Fat: 0g
- Trans Fat: 0g
- Carbohydrates: 0g
- Fiber: 0g
- Protein: 0g
- Cholesterol: 0mg
Keywords: gel air fresheners, DIY home scent, essential oils, natural freshener, homemade craft