Festive Christmas Cookie Bars: A Holiday Must-Have!
Festive Christmas Cookie Bars: A Holiday Must-Have! : when the holiday season comes around, there’s a special joy in gathering with family and friends. The scent of baked goods fills the air, and everyone looks forward to festive treats that are often shared during this time. One such delightful treat that embodies the spirit of Christmas is the Festive Christmas Cookie Bars. These bars are not only delicious but also bring a festive flair to your dessert table. With their vibrant colors and enchanting flavors, they are sure to become a staple in your holiday baking traditions.

Why You Will Love This Recipe Festive Christmas Cookie Bars: A Holiday Must-Have
What makes these cookie bars a must-have during the holidays? First, they are incredibly easy to prepare. Unlike traditional cookies, which require individual shaping and baking, cookie bars are baked in a single pan, making the process quicker and more efficient. Second, these bars are soft and chewy, providing the perfect texture that cookie lovers crave.
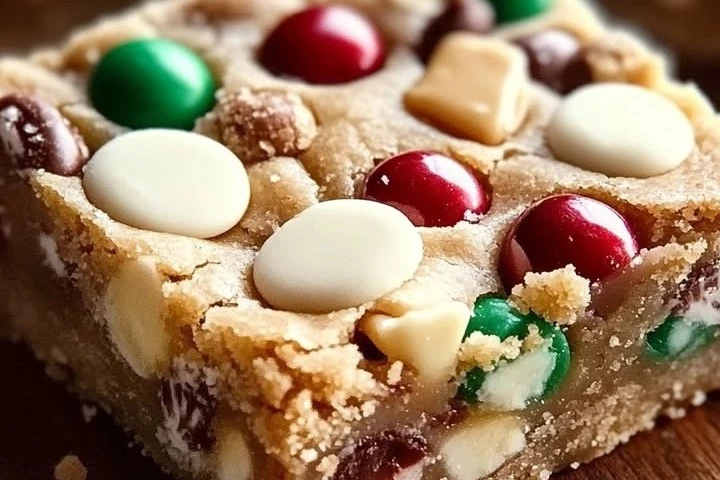
Each bite is filled with the joyous colors of red and green M&Ms, making them visually appealing as well. The combination of flavors, paired with a hint of vanilla and the sweetness of chocolate candies, creates a delightful treat that everyone will love. Plus, they are perfect for sharing at holiday gatherings, cookie exchanges, and festive parties.
So, get ready to dive into this easy and fun recipe that will leave your loved ones asking for seconds!
How to Prepare Festive Christmas Cookie Bars
Ingredients:
To whip up a batch of these Festive Christmas Cookie Bars, you will need the following ingredients:
- 2 ½ cups all-purpose flour
- 1 teaspoon baking soda
- ½ teaspoon salt
- 1 cup unsalted butter, softened
- 1 cup granulated sugar
- 1 cup packed brown sugar
- 2 large eggs
- 2 teaspoons vanilla extract
- 1 ½ cups red and green M&Ms
- 1 cup white chocolate chips
Instructions:
Now that you have gathered all the ingredients, it’s time to get started. Follow these simple steps to make your cookie bars:
- Preheat the Oven: Start by preheating your oven to 350°F (175°C). This ensures that your cookie bars bake evenly.
- Prepare the Baking Pan: Grease a 9×13 inch baking pan with cooking spray or line it with parchment paper. This will help in removing the bars easily after baking.
- Mix Dry Ingredients: In a medium bowl, whisk together the all-purpose flour, baking soda, and salt. Set this mixture aside for later.
- Cream the Butter and Sugars: In a large mixing bowl, beat the softened butter, granulated sugar, and brown sugar together until the mixture is light and fluffy. This usually takes about 2-3 minutes using an electric mixer.
- Add Eggs and Vanilla: Next, add the eggs one at a time, beating well after each addition. Then mix in the vanilla extract.
- Combine Wet and Dry Ingredients: Gradually add the dry ingredient mixture to the wet ingredients, mixing until just combined. Be careful not to overmix, as this can make the bars tough.
- Fold in M&Ms and White Chocolate Chips: Gently fold in the red and green M&Ms along with the white chocolate chips until evenly distributed throughout the dough.
- Spread the Mixture in the Pan: Pour the cookie dough into the prepared baking pan. Use a spatula or your hands to evenly spread the dough to all corners of the pan.
- Bake: Place the pan in the preheated oven and bake for about 25-30 minutes, or until the edges are golden brown, and a toothpick inserted in the center comes out clean.
- Cool and Cut: Once baked, remove the pan from the oven and allow it to cool in the pan for about 10-15 minutes. After that, transfer the bars to a wire rack to cool completely. Once cooled, cut into squares or rectangles and enjoy!
How to Serve Festive Christmas Cookie Bars
When it comes to serving your Festive Christmas Cookie Bars, there are plenty of fun and festive ideas to consider. Here are a few suggestions:
- On a Dessert Platter: Arrange the cookie bars neatly on a decorative serving platter. You can even sprinkle some powdered sugar on top for a snowy effect. A platter filled with colorful bars is sure to attract attention!
- With Milk or Hot Cocoa: Serve these cookie bars alongside a glass of cold milk or a warm cup of hot cocoa. The combination makes for a delightful treat, especially on a chilly holiday evening.
- As Party Favors: If you are hosting a holiday party, consider wrapping individual cookie bars in cellophane bags tied with colorful ribbons. They make sweet party favors for guests to take home.
- In Gift Boxes: For a thoughtful homemade gift, place the cookie bars in a festive box or tin and share with friends and family. Personal touches like a hand-written note can make the gift even more special.
How to Store Festive Christmas Cookie Bars
To keep your cookie bars fresh and delicious, proper storage is essential. Here’s how to store them:
- At Room Temperature: You can store the cookie bars in an airtight container at room temperature for up to a week. Simply place parchment paper between layers to keep them from sticking together.
- In the Refrigerator: If you want to extend their freshness, you can refrigerate the bars. They will last for about two weeks when stored in an airtight container in the fridge.
- For Long-Term Storage: If you have leftover bars or want to prepare ahead of time, you can freeze them. Wrap individual bars in plastic wrap and then place them in a freezer bag or airtight container. They can be frozen for up to three months. To enjoy, simply thaw them at room temperature.
Tips for Preparing Festive Christmas Cookie Bars
Here are some tips to ensure your Festive Christmas Cookie Bars turn out perfectly every time:
- Softened Butter is Key: Make sure your butter is softened to room temperature. It should be soft enough to easily blend with sugar but not melted.
- Don’t Overmix the Dough: When combining wet and dry ingredients, mix just until combined. Overmixing can lead to a dense texture.
- Use Quality Chocolate: For the best flavor, choose high-quality white chocolate chips. They will enhance the overall taste of the cookie bars.
- Experiment with Mix-Ins: Feel free to customize the bars by adding nuts, toffee bits, or other types of chocolate chips. The possibilities are endless!
Variation
While the classic version of these cookie bars is delightful, there are various ways to switch it up. Here are a few ideas for variations:
- Peppermint Chocolate Bars: Add crushed peppermint candies or peppermint extract to your recipe for a refreshing twist.
- Nutty Addition: Incorporate chopped walnuts or pecans for extra crunch and flavor.
- Brownie Bars: Replace half of the all-purpose flour with cocoa powder for a brownie-like texture and taste.
Frequently Asked Questions
1. Can I use different candies?
Yes! You can swap out the red and green M&Ms for other types of candies. Try using chocolate chips, seasonal sprinkles, or even dried fruits for a unique twist.
2. How do I know when the cookie bars are done?
The cookie bars are done when the edges are golden brown and a toothpick inserted in the center comes out clean. They may appear slightly underbaked in the center but will continue to cook while cooling.
3. Can I make this recipe gluten-free?
Absolutely! You can substitute all-purpose flour with a gluten-free flour blend in equal measure. Just ensure that all other ingredients, especially baking soda and chocolate, are gluten-free.
Conclusion
Festive Christmas Cookie Bars are an easy and enjoyable way to bring some holiday cheer to your home. With their chewy texture, delicious flavors, and vibrant colors, they are perfect for any holiday gathering or simply as a sweet treat to enjoy at home. Following this simple recipe will not only provide a delightful dessert but also create wonderful memories with your loved ones.
So, gather your ingredients and start baking these festive treats that everyone will adore. Happy Holidays and enjoy your baking adventure!