Dinosaur Night Lights: Craft a Glowing Prehistoric Terrarium in a Jar
If your child loves dinosaurs, glowing lights, or anything miniature, this Dinosaur Night Light project is the perfect blend of imagination and craft. By turning a simple mason jar into a magical prehistoric terrarium, this DIY activity brings both fun and function to your child’s room or play area. The warm glow from the submersible candle makes it a soothing night light, while the miniature dino world inside sparks creativity and play. Whether you’re crafting as a weekend project, birthday gift, or science-themed decoration, this dinosaur jar is a memorable keepsake for kids and adults alike.
Table of Contents
Ingredients
To make your own dinosaur night light, gather these supplies:
Craft Materials
- 16 oz plastic mason jar with lid
- Plastic plants and miniature trees
- Small rocks
- Sand
- Flat glass marbles
- Moss
- Plastic dinosaurs
- Submersible candle lights
Craft Tools
- Hot glue gun
- E6000 glue
- Scissors
- Black marker
Instructions
Step 1: Prepare the Lid
Flip the moss upside down and place the mason jar lid on top. Use a black marker to trace around the edge of the lid and cut out a circle from the moss sheet. Also cut a strip of moss wide enough to wrap around the side band of the lid. Use a hot glue gun to attach the moss circle to the top of the lid and the moss strip around the rim. This will give your jar a natural, forest-like finish.
Step 2: Attach the Light
Turn the lid upside down. Using E6000 glue, attach a submersible candle light to the center of the inside of the lid. Let the glue dry completely—this may take several hours. It’s important that the light is secure before continuing to the next step.
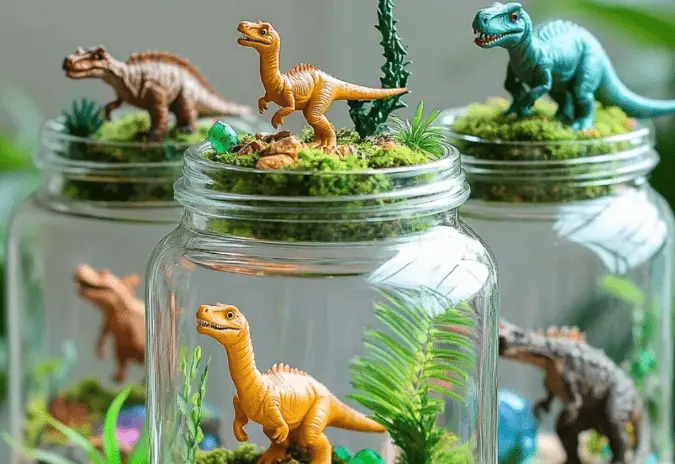
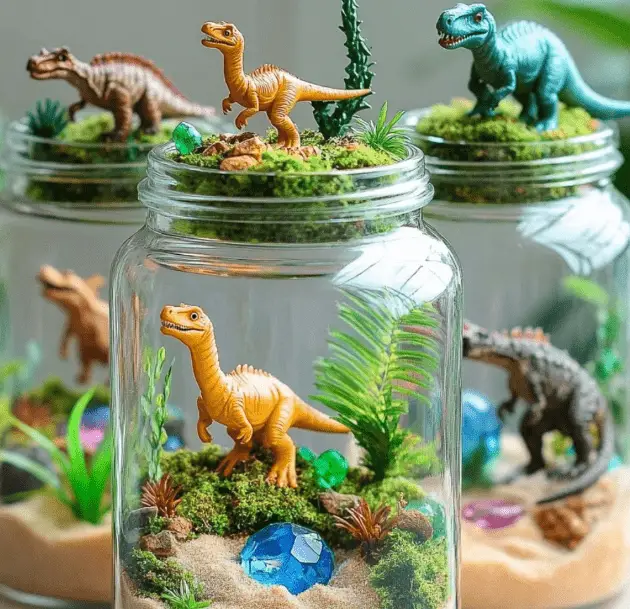
Step 3: Create the Terrarium
Start by pouring a thin layer of sand into the mason jar. Next, add small flat glass marbles and decorative rocks to give the base texture and variety. Insert small plastic plants and trees to mimic a prehistoric jungle. Now it’s time to add the stars of the show—your miniature dinosaurs. Position them throughout the scene, creating playful or dramatic dino interactions. Finally, tuck small patches of moss around the inside of the jar to make the terrain look lush and natural.
Step 4: Assemble the Night Light
Once your mini terrarium is complete, carefully place the lid on the jar and screw it on tightly. You can now turn on the submersible light and watch the jar glow from within. To finish, decorate the top of the lid by gluing on small rocks and one of your extra plastic dinosaurs. This adds a nice touch and completes the look of your themed night light.
Benefits of This Craft
This project is more than just a fun decorative item—it’s packed with educational and developmental benefits. For children, assembling the dino scene builds spatial awareness, fine motor skills, and imaginative thinking. For parents and educators, it’s a wonderful way to introduce the concept of terrariums, habitats, and even basic geology. The combination of hands-on activity and creative design fosters confidence and focus. Plus, the finished product doubles as a comforting night light, giving kids a sense of pride and comfort when they see their glowing creation at bedtime.
Tips
Choose a plastic mason jar over a glass one for safety, especially if the craft is for younger children. If you’re sourcing materials, dollar stores and thrift shops often carry inexpensive miniature dinosaurs, trees, and decorative stones. To make your terrarium extra unique, consider painting the inside of the jar lid with glow-in-the-dark paint for added effect. Keep the elements inside the jar loose (not glued), so kids can rearrange the dino scene anytime they want. Make it educational by researching the dinosaur species you include and turning the craft into a mini science lesson.
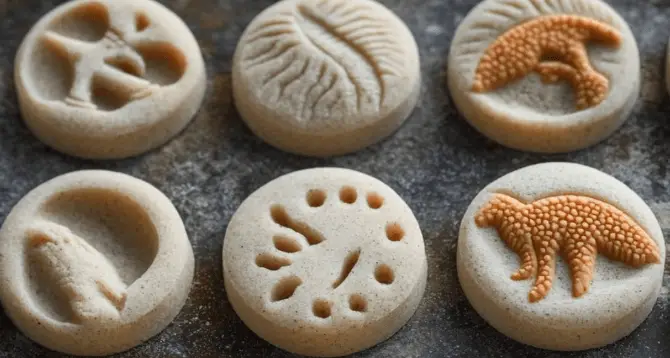
What Taste Look Like
Although not edible, the finished Dinosaur Night Light has a visual appeal that rivals candy displays. Inside the clear mason jar, you’ll see layers of texture from sand, stones, and moss. The greenery adds a jungle vibe, while the brightly colored dinosaurs bring a playful contrast. When lit from within by the submersible candle, the jar glows warmly, illuminating the tiny world and casting soft shadows across the prehistoric scene. The moss-covered lid and mini dino on top make it look like a natural artifact or museum-worthy display piece.
How to Store
Once completed, your dinosaur night light can be safely stored on a shelf, nightstand, or dresser. Make sure it stays upright and in a dry location. If you want to store it long-term or transport it, consider wrapping the jar in bubble wrap and placing it in a box to protect the scene inside. Since none of the inner elements are glued down, you may want to check for any loose pieces that shift during movement. The submersible light is usually battery-operated, so remember to turn it off during the day to preserve battery life.
Conclusion
Creating a Dinosaur Night Light is a perfect way to combine art, science, and imagination into one fun project. It’s easy to customize, affordable to make, and brings a unique glow to any room. From designing the tiny terrain to choosing your favorite dinosaurs, every step of this DIY craft offers a hands-on experience full of learning and laughter. Whether you’re working on it as a parent-child project, a classroom activity, or a solo weekend creation, this jar-sized dino world is sure to become a beloved favorite.
For More DIY craft ideas, visit More DIY craft ideas
FAQ
Is it safe to leave the light on overnight?
Yes, submersible LED lights are battery-powered and safe to use as night lights. However, always check product guidelines to ensure they are suitable for extended use.
Where can I buy the small dinosaurs and plants?
Toy stores, dollar stores, craft supply shops, and even thrift stores are great places to find miniature decorations for your jar.
Can I glue the dinosaurs and plants down?
Yes, but leaving them loose allows for rearranging. If the jar will be handled often, gluing them down might help keep the design intact.
What size jar works best?
A 16 oz mason jar is ideal, but any clear plastic or glass jar with a secure lid will work as long as your figurines fit comfortably inside.
Do I need to use moss and marbles?
No, those are optional. You can skip or substitute materials depending on what you have on hand, making the craft as simple or detailed as you like.