DIY Moon Rocks: A Sparkling Space-Themed Craft for Kids and Families
If you’re looking for a fun, educational, and mess-friendly project that keeps kids engaged, these DIY Moon Rocks are a perfect choice. Inspired by the mystery and wonder of outer space, this hands-on craft combines science and creativity in a way that’s both entertaining and educational. Kids can shape, mold, and decorate their own glittering moon rocks, learning about texture, color mixing, and solidification along the way. Ideal for classrooms, rainy day fun, or space-themed parties, this activity is easy to set up and rewarding to complete.
To find more fun and family-friendly projects like this one, visit More DIY craft ideas for dozens of inspiring craft tutorials.
Table of Contents of DIY Moon Rocks
Ingredients
Here’s what you’ll need to make your own DIY Moon Rocks:
- 4 cups baking soda
- 1/4 cup water
- Black food coloring
- Glitter (silver or multicolor works best)
Optional materials: a tray for shaping and drying, gloves for mixing, and a spoon or spatula for stirring.
Instructions of DIY Moon Rocks
Step 1: Combine Baking Soda and Glitter
In a large mixing bowl, pour in the baking soda. Add a generous amount of glitter—this gives your moon rocks a shimmering, space-like appearance. Mix the dry ingredients thoroughly to ensure even sparkle throughout.
Step 2: Add Color and Water
Slowly add in the black food coloring and water. It’s best to add the water gradually while mixing to control the texture. Continue mixing until you get a dough-like consistency. It should hold its shape when squeezed but still be pliable enough to mold.
Step 3: Shape the Moon Rocks
Use your hands to form rough, jagged rock shapes. The more irregular the shapes, the more realistic your moon rocks will look. Feel free to get creative—some can be small pebbles, while others can be larger boulders.
Step 4: Let Them Dry
Place your shaped moon rocks on a tray or baking sheet. Leave them out at room temperature overnight to harden. In the morning, they’ll be firm, dry, and ready for display or play.
You can use these moon rocks for play, decoration, or even as part of a science demonstration on erosion or geological formation.
Benefits of This Craft
Creating moon rocks isn’t just about crafting—it’s a learning experience disguised as fun. Here are some of the benefits:
- Educational Value: Teaches kids about basic chemical reactions, sensory exploration, and texture changes.
- Motor Skill Development: Molding and shaping the dough strengthens fine motor coordination in young children.
- Sensory Play: The gritty texture of baking soda combined with the sparkle of glitter provides a rich sensory experience.
- Imagination Booster: Encourages kids to explore the solar system through pretend play and storytelling.
- Cost-Effective: Uses simple and affordable household ingredients.
- Mess-Free Option: Easy to clean up, especially if done on a tray or with newspaper underneath.
Tips
- For extra space-themed flair, use metallic or glow-in-the-dark glitter.
- Wear gloves when mixing the food coloring to avoid stained hands.
- Add a few drops of essential oils like lavender for a sensory twist.
- If the dough is too dry, add more water a teaspoon at a time. If it’s too wet, sprinkle in more baking soda.
- You can also add small toy aliens or crystals inside the moon rocks for a surprise element once broken.
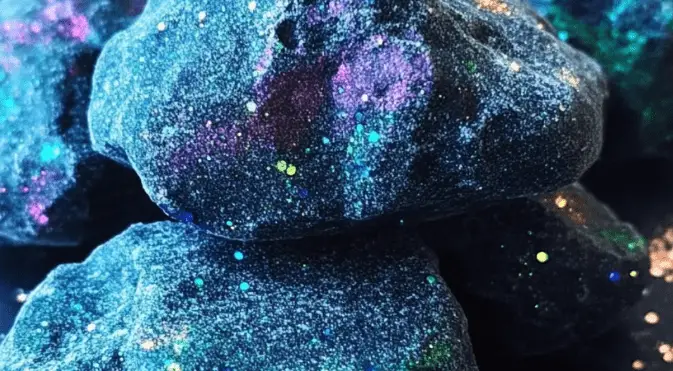
What Do They Look Like?
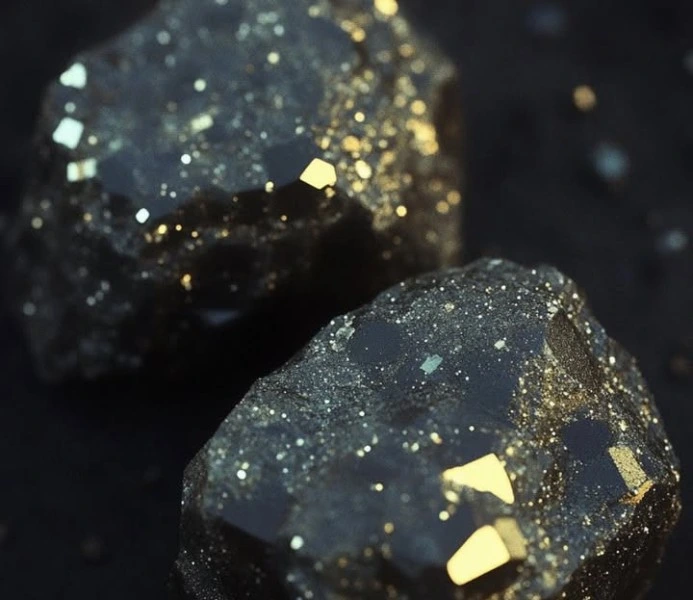
Once complete, these DIY moon rocks resemble craggy, otherworldly stones with a sparkling surface. The combination of dark color and glitter gives them a cosmic appearance, making them look like they’ve been plucked straight from a lunar crater. Depending on how much glitter and food coloring you use, your rocks can range from deep space-black to silvery gray, all with a dazzling shimmer.
They feel cool and chalky to the touch and hold their shape well once dried. When displayed together, they make a striking decorative feature for space-themed shelves or classroom displays.
How to Store
To keep your DIY moon rocks looking their best:
- Store them in a dry place away from direct sunlight or humidity.
- Use a small cardboard box or container to avoid breakage.
- If you notice any soft spots over time, let the rocks air dry again for several hours.
- Do not store in sealed plastic bags, as trapped moisture can cause softening or odor over time.
Properly dried and stored, moon rocks can last several weeks as decorative items or play objects.
DIY Moon Rocks offer the perfect blend of science, creativity, and fun. Whether you’re crafting with kids at home, leading a classroom activity, or hosting a space-themed party, these homemade rocks provide an out-of-this-world experience. They’re a simple way to teach scientific principles while sparking imagination, and the best part is how easy they are to make with everyday supplies.
For more creative ideas like this one, visit More DIY craft ideas to explore a growing collection of hands-on family projects.
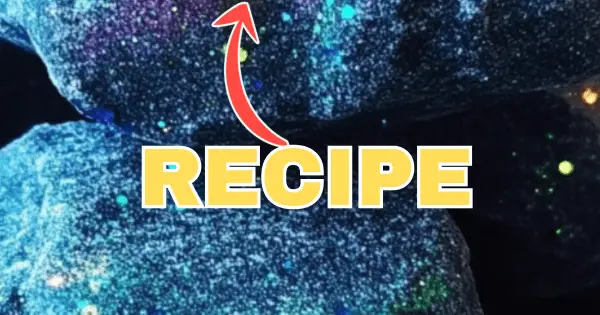
You can also check out this Pinterest pin for a visual guide and more styling inspiration:
See this DIY Moon Rock Tutorial on Pinterest
FAQ
Q: Can I use baking powder instead of baking soda?
A: No, baking soda is essential for the texture and drying consistency. Baking powder won’t provide the same results.
Q: Is black food coloring necessary?
A: Not strictly, but it gives the moon rocks their dark, space-like appearance. You can experiment with other colors if desired.
Q: Are these moon rocks reusable?
A: Once they’re dry, they’re meant for display or light play, not reshaping. However, if you add vinegar, they’ll fizz and dissolve, turning into a new experiment.
Q: Are they safe for toddlers?
A: Yes, with supervision. Make sure young children don’t ingest any part of the mixture.
Q: Can I add other decorations to the rocks?
A: Absolutely. Try embedding small beads, toy stars, or glow-in-the-dark pieces for an added surprise.