Glowing Volcano Recipe: A Dazzling DIY Craft for Kids
The Glowing Volcano is a vibrant, hands-on science craft that brings chemistry to life in a fun and unforgettable way. Designed with kids in mind, this activity combines creativity and learning by showcasing a mini volcanic eruption using common household ingredients. What sets it apart is the use of glow-in-the-dark and neon paints, transforming a simple experiment into a captivating sensory experience. Whether used for a science lesson, a birthday party activity, or just an afternoon of educational fun, this glowing volcano is sure to spark excitement and curiosity.
Table of Contents
Ingredients
To make your very own glowing volcano, gather the following materials:
- 1 cup baking soda
- 1 teaspoon glow-in-the-dark paint
- Vinegar
- Optional: dish soap
- Optional: blacklight
- 23 drops of each color neon paint (for rainbow volcano)
These ingredients are easy to find, budget-friendly, and safe for children with adult supervision.
Instructions
For a single color glowing volcano:
- Start by adding about 1 cup of baking soda to a bowl.
- Mix in 1 teaspoon of glow-in-the-dark paint thoroughly.
- Pour vinegar into the bowl and watch the glowing volcano erupt before your eyes.
For a rainbow volcano:
- Once again, add about 1 cup of baking soda to a clean bowl.
- Add 23 drops of each color of neon paint to the mixture for a bold rainbow effect.
- Slowly pour vinegar into the bowl and stand back to enjoy a spectacular, colorful eruption.
Benefits of This Craft
The glowing volcano craft is more than just fun—it’s educational and enriching on many levels. Here’s why it’s worth trying:
- STEM Learning: Kids learn basic chemical reactions by combining baking soda and vinegar, gaining insight into acid-base interactions in a memorable way.
- Sensory Development: The bright colors, fizzing sounds, and tactile nature of the craft engage multiple senses.
- Creativity and Art: Adding glow-in-the-dark or neon paints lets children explore color mixing and visual expression.
- Hands-On Learning: Encourages curiosity and hands-on experimentation, which are essential to early childhood education.
- Parent-Child Bonding: This project is perfect for parents and caregivers looking to spend quality time with kids in a meaningful activity.
Tips
To elevate your glowing volcano experience, try these helpful tips:
- Use a blacklight: Place a blacklight above your workspace to highlight the glow-in-the-dark or neon effects, especially in a dimly lit room.
- Add dish soap: A small squirt of dish soap to the mixture can slow the reaction and make the foaming eruption last longer, adding to the visual fun.
- Layer the paints: When making the rainbow volcano, layer the colors in the baking soda before pouring vinegar. This creates a swirling rainbow effect when the eruption starts.
- Use a tray: Always place the bowl or volcano structure on a large tray or plate to catch any overflow and make cleanup easy.
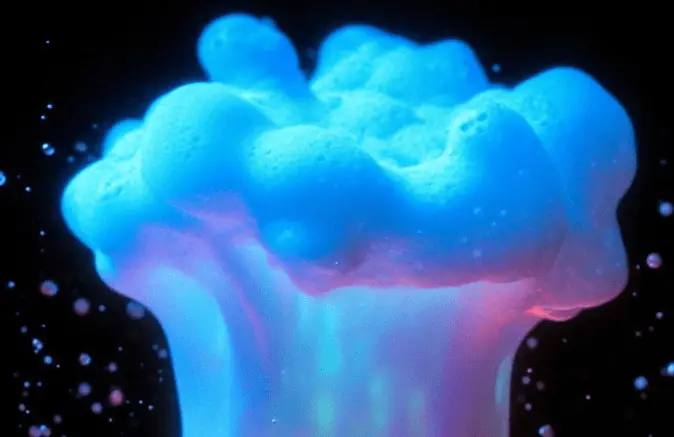
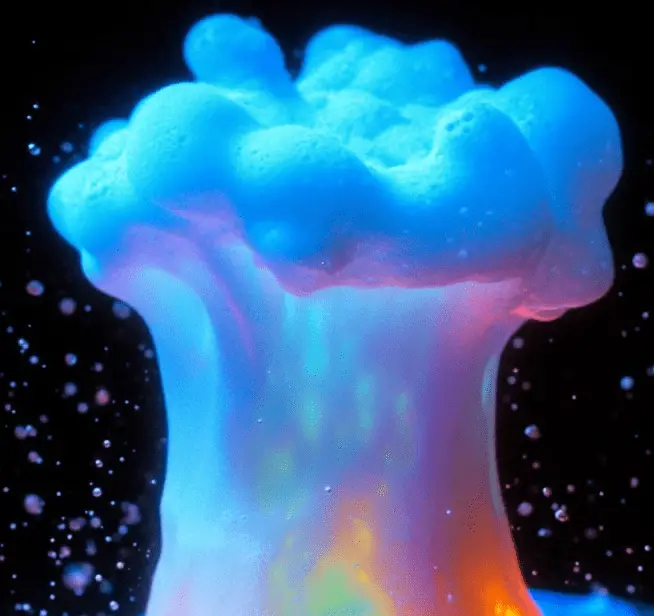
What Does It Look and Feel Like?
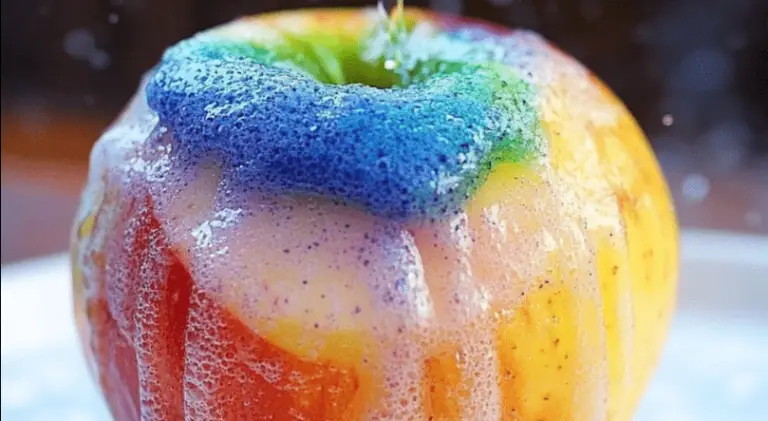
The glowing volcano is visually stunning and full of texture. When the vinegar hits the baking soda, the mixture fizzes and foams, rising up and overflowing like a miniature volcanic eruption. The use of glow-in-the-dark and neon paints makes the foam shimmer in dim lighting or under a blacklight, casting a glowing, magical appearance. The reaction is both bubbly and soft to the touch, giving kids a fascinating sensory experience. The rainbow version is even more impressive, producing a mix of vibrant, swirling colors as the foam bursts forth.
How to Store
This craft is meant to be experienced in the moment, and because it relies on an active chemical reaction, it cannot be stored in its completed form. However, you can prepare the materials ahead of time:
- Dry ingredients: Store the baking soda and glow-in-the-dark paint mixture in an airtight container. Keep the neon paint bottles ready nearby.
- Liquid ingredients: Store vinegar and any pre-mixed vinegar with neon paint in closed containers or bottles.
- Setup ready: Pre-arrange all your supplies in a tray or kit so the activity is quick to begin when you’re ready to use it.
Keep in mind that once vinegar is added to baking soda, the reaction starts immediately and cannot be reused.
The glowing volcano craft is an ideal way to blend fun, science, and creativity. It captivates children with a glowing, bubbling display while teaching basic chemical reactions. This simple yet impressive DIY project can be done at home with minimal supplies, offering both educational value and visual delight. Whether you choose the single-color or rainbow version, this activity is sure to impress. It’s a fantastic way to introduce children to the joys of science and DIY exploration.
Looking for more creative inspiration for kids’ activities? Check out More DIY craft ideas to discover hands-on projects that are both fun and educational.
FAQ
Can I use regular food coloring instead of glow-in-the-dark paint?
Yes, but the glowing effect won’t be visible. Glow-in-the-dark or neon paints are needed to achieve that vibrant result, especially under a blacklight.
Is this experiment safe for young children?
Yes, with adult supervision. All ingredients are non-toxic, but it’s best to ensure kids don’t ingest the paint or vinegar.
Can I make the volcano structure look more realistic?
Absolutely. You can mold a volcano shape using clay or playdough around a cup or bowl, then follow the same instructions inside it for a more realistic volcano appearance.
How can I make the glow last longer?
Using a blacklight enhances the glow significantly. Also, using glow-in-the-dark paint that has been charged with light beforehand can help sustain the glow.
What surface should I use for this activity?
A large tray, baking sheet, or plastic tablecloth is ideal to catch any overflow and make cleanup easier.