Homemade Apple Cider Vinegar: A Natural, Simple DIY for Your Kitchen
Apple cider vinegar has earned a permanent spot in kitchens around the world thanks to its versatility and health-boosting reputation. But did you know you can easily make it at home with just a few ingredients? This DIY project is not only cost-effective but also a rewarding process that gives you full control over what goes into your pantry.
Whether you use it for salad dressings, marinades, cleaning, or natural wellness, homemade apple cider vinegar is a staple worth crafting. This guide will walk you through every step of the process, from ingredients to storage tips, so you can make your own batch confidently and successfully.
Table of Contents
Ingredients
To make your own apple cider vinegar, you’ll only need three simple ingredients:
- Water
- Sugar
- Apple cores
These ingredients are typically available in any home, especially after making an apple-based recipe. Using apple scraps helps reduce food waste, making this craft not only useful but also eco-friendly.
Instructions
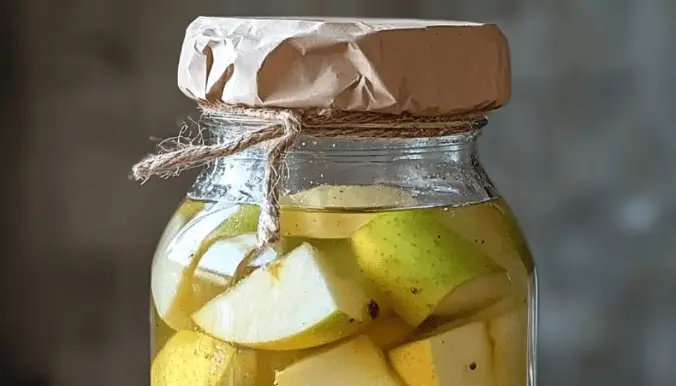
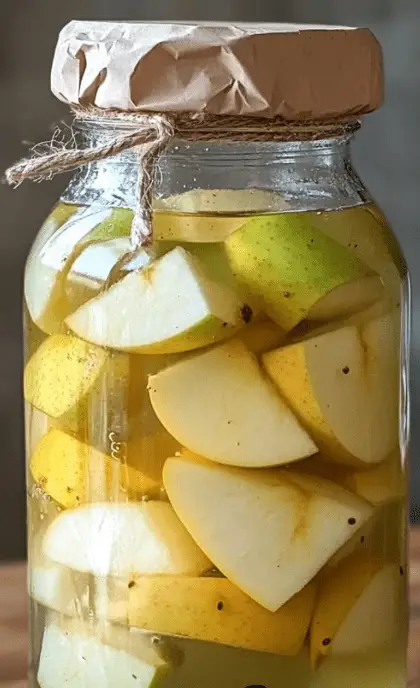
- Prepare the jar: Fill a clean glass jar with apple cores. Don’t pack them too tightly and be sure to leave about 3 inches of space at the top to allow for fermentation bubbles and airflow.
- Mix the sugar water: In a separate bowl, combine warm water with sugar at a ratio of 1 cup of water to 1 tablespoon of sugar. Stir until the sugar is fully dissolved.
- Add liquid to jar: Pour the sugar water over the apple cores until they are completely submerged. Be sure to leave about 1.5 inches of space at the top of the jar.
- Cover the jar: Place a coffee filter or a clean cloth over the jar opening and secure it with a rubber band. This allows airflow while keeping dust and insects out.
- First fermentation: Store the jar in a warm, dark place (like a cupboard) for two weeks. During this time, natural fermentation will begin. You may notice bubbles or a cloudy appearance—this is normal.
- Strain and return to the jar: After two weeks, remove the apple cores and strain the liquid through a fine mesh or cheesecloth. Pour the liquid back into the jar.
- Second fermentation: Cover the jar again with the cloth and return it to the dark spot. Let it sit for another 2 to 4 weeks. Taste it every few days until it reaches the acidity level you prefer.
- Seal and store: Once you’re satisfied with the taste, cap the jar with a proper lid and store it in your pantry. Your vinegar is now ready to use.
Benefits of This Craft
Making your own apple cider vinegar has numerous benefits beyond the obvious savings and self-sufficiency.
- Cost-effective: Store-bought vinegar can be pricey, especially organic versions. This DIY recipe uses leftovers, making it virtually free.
- Waste reduction: Repurpose apple scraps instead of throwing them away, contributing to a more sustainable kitchen.
- Natural and additive-free: You control the entire fermentation process, ensuring no preservatives or artificial ingredients are added.
- Healthier lifestyle: Raw, unfiltered apple cider vinegar can be used in wellness routines such as detox drinks, digestive aids, or homemade beauty products.
- Educational experience: Great for kids and adults alike, this craft teaches patience, observation, and the basics of fermentation science.
Tips
To ensure your homemade vinegar turns out perfectly, consider the following tips:
- Use organic apples if possible, especially if you’re including the peels, to avoid pesticide residues.
- If your home is cooler, fermentation may take longer. In that case, allow for the full 4 weeks during the second stage.
- Stir the mixture every couple of days during the first fermentation to prevent mold from forming on the apple pieces.
- If any mold or strange odors appear (other than the tangy vinegar smell), discard and start over with a sanitized jar.
- For added depth of flavor, include peels along with the cores. They contain natural yeasts that encourage fermentation.
- Once sealed, your vinegar will continue to develop in flavor over time in storage.
These steps will help you avoid common pitfalls and achieve a flavorful, well-balanced vinegar every time.
What Does It Taste and Look Like?
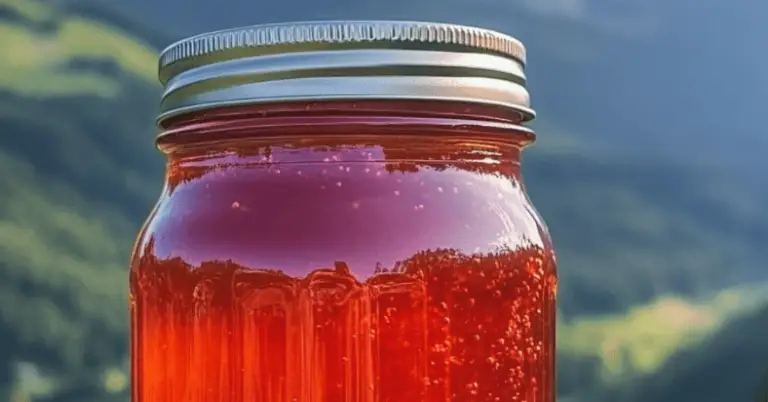
Your finished homemade apple cider vinegar will have a cloudy amber appearance and a tangy aroma that’s both sharp and fruity. The taste is bold, slightly sweet at the front, with a strong acidic finish—just like the store-bought versions, but often fresher and more nuanced.
The acidity level may vary depending on fermentation time and apple variety, but overall, it should provide a clean, zesty kick to any dish or dressing. Unlike commercial vinegar, your DIY version will likely be raw and unfiltered, which means it may include the “mother”—a harmless substance made of beneficial bacteria.
How to Store
Proper storage is essential to keep your apple cider vinegar tasting great and shelf-stable:
- Transfer the finished vinegar to a clean, airtight glass jar or bottle once fermentation is complete.
- Store it in a cool, dark place like a pantry or cupboard—no need for refrigeration.
- Label your jar with the date of bottling so you can track freshness. Properly stored, it can last for up to a year or more.
- If you notice sediment or strands forming over time, this is perfectly safe—it’s just the vinegar continuing to develop and can even be used to start a new batch.
Your vinegar is now ready to be used in everything from homemade vinaigrettes to all-natural cleaning sprays.
Making apple cider vinegar at home is a fulfilling project that saves money, reduces waste, and offers a sense of accomplishment every time you reach for your bottle. With just apples, sugar, and water, you can harness the power of natural fermentation to create a kitchen essential that’s as versatile as it is beneficial.
Once you’ve made your first batch, you may never go back to store-bought again. Plus, you can experiment with new flavors by using different types of apples or adding spices like cinnamon or cloves during fermentation.
Curious about more ways to get creative in your kitchen? Visit More DIY craft ideas to find other exciting and easy home projects you can try today.
Looking for visuals? This Pinterest pin is a great example of homemade vinegar in progress and how it should look during fermentation.
FAQ
How long does homemade apple cider vinegar last?
If stored properly in a sealed container at room temperature, it can last up to a year or longer. Natural vinegar is self-preserving due to its acidity.
Do I need to use whole apples or can I just use scraps?
Apple cores and peels are ideal for this recipe. If you prefer, you can also use chopped apples for a more robust flavor.
Can I speed up the fermentation process?
Fermentation takes time to develop acidity and depth. However, keeping the jar in a warm (not hot) spot can help maintain a steady fermentation pace.
Is the cloudy stuff in my vinegar bad?
No. The cloudy substance or strands are part of the “mother,” which contains beneficial bacteria. It’s a sign of natural, unfiltered vinegar.
Can I use honey instead of sugar?
Yes, but honey may ferment differently and more slowly. For a consistent result, start with sugar for your first batch.
Other Sources for More Inspiration
If you’re looking to explore more fermenting or kitchen-based DIYs, check out the following helpful resources: