Homemade Glowing Bubbles: A Magical DIY Craft for Night-Time Fun
Creating Homemade Glowing Bubbles is a simple, safe, and magical DIY craft that brings together science, creativity, and hands-on fun. Whether you’re planning a summer evening with kids, a glowing backyard party, or just want to explore light and color in a new way, these glowing bubbles are a fantastic activity for all ages. Using a few household ingredients and a UV light, you can craft an exciting sensory experience that blends art with a bit of chemistry.
This project is perfect for engaging kids in hands-on learning while having a blast. Even adults won’t be able to resist the fun once those radiant orbs start floating through the air. Below, you’ll find everything you need to recreate this activity at home—plus expert tips and answers to common questions.
Table of Contents
Ingredients for Your Glowing Bubble Mixture
To make your own glowing bubbles, you’ll need the following ingredients:
- 1 cup bubble solution
- 1 highlighter (non-toxic, preferably yellow or green)
- 1/4 cup warm water
- Optional: 1 small squirt of dish soap
- 1 UV blacklight or torch
- If making your own bubble solution:
- 1 cup warm water
- 2 tablespoons dish soap
- 1 tablespoon corn syrup or sugar
These ingredients are typically safe and easy to find in most households, making this craft both affordable and accessible.
Instructions: Step-by-Step to Glowing Success
1. Prepare the Bubble Solution
You can either use store-bought bubble solution or make your own. To make your own, combine 1 cup of warm water, 2 tablespoons of dish soap, and 1 tablespoon of corn syrup or sugar. Stir gently to avoid creating too much foam.
2. Extract the Glow
Carefully open a non-toxic highlighter and remove the felt ink core. Place it in a jar with 1/4 cup of warm water. Let it soak for 10–15 minutes, stirring occasionally. This will extract the glowing pigment into the water.
3. Remove the Ink Core
Once the water is infused with bright, glowing color (check it under the blacklight), remove and discard the ink core.
4. Combine the Mixtures
Slowly pour the glowing water into your bubble solution. Stir gently to mix. For more foamy bubbles, you can add a small extra squirt of dish soap.
5. Set Up the Glow Zone
Find a dark space—indoors or outdoors—and set up your blacklight or UV torch. This will illuminate the glowing pigments in your bubbles.
6. Blow Glowing Bubbles
Dip your bubble wand into the mixture and blow! Watch in amazement as the glowing bubbles float through the dark.
Benefits of This DIY Craft
One of the best things about this project is its ability to combine entertainment and education. Children (and adults) learn about light, reflection, and surface tension in a playful, hands-on way. It’s also a great sensory activity for younger kids who benefit from visual stimulation and outdoor exploration.
Glowing bubbles are perfect for:
- STEM learning at home or in classrooms
- Birthday party activities
- Summer night entertainment
- Creative photo shoots
- Family bonding without screen time
Tips for the Best Results
- Choose the right highlighter: Yellow and green non-toxic highlighters tend to glow the brightest under UV light. Avoid permanent markers, as they may contain harmful chemicals.
- Avoid overmixing: Stirring the solution too vigorously can create foam, which disrupts bubble formation.
- Test your blacklight: Before starting, test the glowing water under your UV light to ensure it reacts properly.
- Use clean wands or make your own: A simple loop made from wire or string works well. Dirty or soapy wands can reduce glow or bubble output.
- Blow gently: Gentle blowing creates larger bubbles and helps maintain the glowing effect.
What Do Glowing Bubbles Taste Look Like?
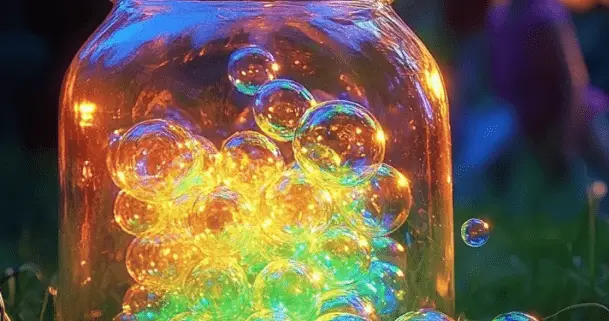
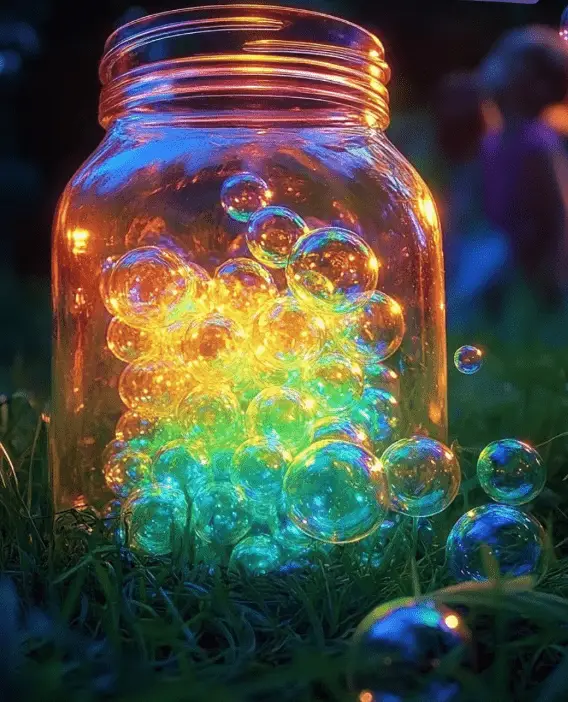
While we definitely don’t recommend tasting them, glowing bubbles look absolutely mesmerizing. Under UV light, they shimmer and radiate vivid neon hues—primarily bright yellow or green depending on the highlighter used. As they float, they create an almost magical illusion, especially in the dark. The bubble surface appears to glow from within, making them an incredible visual experience for night-time gatherings or glow-in-the-dark parties.
How to Store the Bubble Solution
If you have leftover glowing bubble solution, you can store it in an airtight container for a few days. However, for best results:
- Keep it in a cool, dark place away from sunlight
- Shake gently before reuse as some ingredients may separate over time
- Use within 2–3 days to maintain the glow intensity
Note: Over time, the glowing effect may fade slightly, especially if exposed to air or light. Always supervise children when reusing the solution.
Homemade glowing bubbles are a wonderful mix of science, art, and pure fun. They’re easy to make, safe when using non-toxic materials, and guaranteed to light up any evening. Whether you’re looking for a creative summer project, a unique party idea, or just something magical to do with your kids after dark, this DIY activity is a glowing success in every way.
For more hands-on recipes and simple ideas that bring joy to everyday life, don’t forget to check out More DIY craft ideas on our site.
FAQ
Can I use any highlighter for this project?
Use only non-toxic highlighters. Yellow and green glow the brightest under blacklight. Avoid permanent markers.
Is this safe for young children?
Yes, if you use non-toxic materials and supervise the activity, it’s safe for most kids. Avoid ingestion and eye contact.
Do I need a blacklight for this to work?
Yes, the glowing effect is only visible under UV or blacklight. Regular light won’t produce the same visual result.
Why aren’t my bubbles glowing?
Check the highlighter type and ensure the ink was fully extracted. Also, make sure your blacklight is functioning correctly.
Can I make the solution ahead of time?
Yes, but it’s best used fresh. If stored, keep it sealed and shake gently before reuse.