How to Make and Can Homemade French Fries: for Crispy, Ready-to-Cook Perfection
Presentation
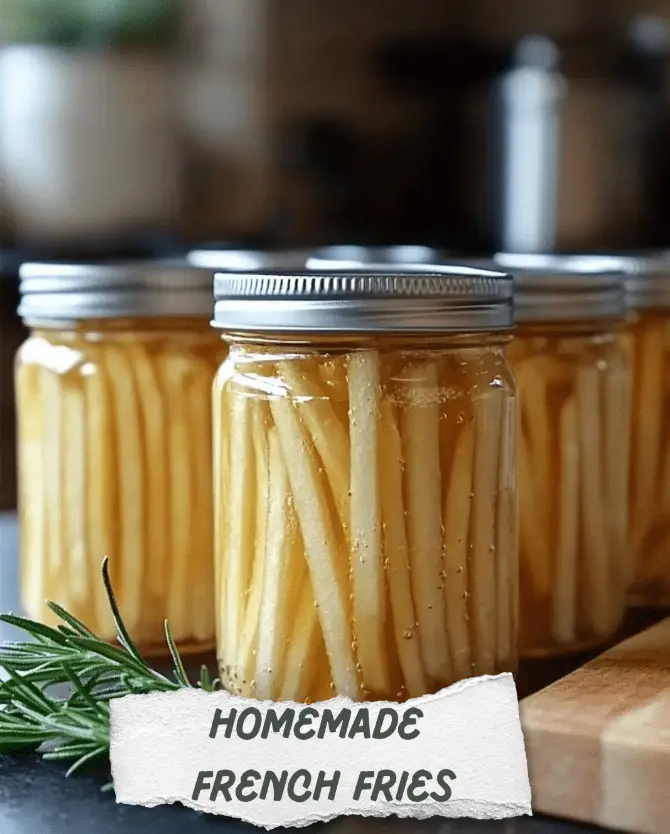
Homemade canned French fries bring a delicious twist to food preservation. This easy, satisfying recipe transforms basic potatoes into shelf-stable fries that are ready to crisp up at a moment’s notice. Whether you want a side dish for burgers or a quick snack, having prepped and canned fries on hand is a game-changer. Not only does it save you time, but it also gives you control over the ingredients and seasoning. The process might sound surprising to some, but canning fries is a smart and fun way to extend the shelf life of your favorite comfort food.
Table of Contents
Ingredients
- Potatoes, peeled and cut into fry shapes
- Water, for soaking
- Salt (1 tsp per quart or 1/2 tsp per pint)
- Boiling water
Instructions
- Prepare the Potatoes: Start by peeling your potatoes and slicing them into uniform fry-shaped strips, ideally about 1/2 to 3/4 inch wide.
- Soak the Potatoes: Place the cut fries in a bowl of water to remove excess starch. Change the water three times and let them soak for around an hour each time.
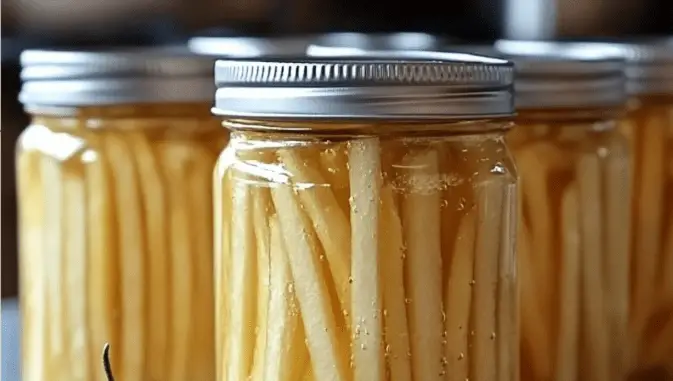
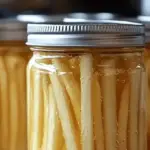
- Pack the Jars: Sterilize your canning jars. In each quart jar, add 1 teaspoon of salt. If using pint jars, add 1/2 teaspoon instead. Pack the fries snugly into the jars, leaving about an inch of headspace.
- Fill with Boiling Water: Bring some water to a rolling boil, then carefully pour it over the fries in the jars, ensuring they are fully submerged.
- Pressure Can the French Fries: Process the jars at 10 pounds of pressure for 35 minutes for pint jars, or 40 minutes for quart jars.
- Label and Store: After cooling, check the seals and label the jars with the date. Store them in a cool, dark place.
- To Serve: When you’re ready to indulge, drain and rinse the fries from the jar. Fry them in hot oil until golden brown (about 7-10 minutes at 375°F), or bake in the oven at 425°F for 25-30 minutes, flipping halfway for a crispy finish.
Benefits of This Craft
Canning homemade French fries offers more than just convenience. It promotes food security, reduces waste, and helps you use up surplus potatoes before they spoil. Canning fries means you’ll always have a versatile side ready to go, and it gives you complete control over sodium levels and added ingredients. Plus, learning this technique opens up a broader world of home food preservation.
Tips
- Use starchy potatoes like Russets for the best results. They hold up well during canning and yield crispier fries.
- Be meticulous about soaking and rinsing the potatoes to remove excess starch, which helps prevent cloudiness and ensures better texture.
- Always follow pressure canning guidelines for safety. Boiling water canning is not safe for this recipe.
- Label jars clearly with the date to keep track of freshness.
- For a more seasoned fry, consider sprinkling herbs or garlic powder after cooking.
What Taste Look Like?
The fries come out with a slightly soft texture right out of the jar, but once baked or fried, they develop a golden crispy exterior and a fluffy inside. Their flavor is mild and slightly savory from the salt, allowing them to pair perfectly with dipping sauces like ketchup, aioli, or spicy mayo. The taste is similar to traditional French fries, but with a touch more earthiness from the canning process. Whether fried or oven-baked, the end result is satisfying and delicious.
How to Store
After pressure canning and ensuring that the jars are properly sealed, store them in a cool, dark place like a pantry or basement. These canned fries can last up to 12 months when sealed and stored correctly. Once a jar is opened, any unused fries should be kept in the refrigerator and consumed within 3–4 days. For best taste and texture, always drain and dry the fries before cooking.
Homemade canned French fries combine the comfort of a beloved snack with the practicality of home canning. This DIY project is ideal for families, busy cooks, or anyone looking to make meal prep easier. With a little time and care, you can stock your shelves with jars of crispy potential just waiting to be enjoyed. It’s one more step toward mastering your kitchen and reducing dependency on store-bought convenience foods.
If you enjoyed this guide and want more clever kitchen ideas, be sure to explore More DIY craft ideas for daily inspiration you can bring to your table.
FAQ
Can I season the fries before canning?
It’s best to stick to just salt during canning to ensure safety. You can add other seasonings after cooking.
Can I use sweet potatoes?
Sweet potatoes can be canned similarly but require their own tested recipe. Stick with regular potatoes for this method.
Do I need a pressure canner?
Yes. Low-acid foods like potatoes must be pressure canned to eliminate the risk of botulism.
Can I make thinner fries or wedges?
You can cut them however you like, but keep sizes consistent to ensure even canning and cooking results.
Can I reuse the canning jars?
Yes, but always use new lids to ensure a proper seal.
How to Make and Can Homemade French Fries: for Crispy, Ready-to-Cook Perfection
- Total Time: 2 hours 40 minutes
- Yield: 4 pint jars
- Diet: Vegan
Description
Preserve homemade fries in jars for easy, crispy indulgence anytime — just fry or bake straight from the pantry.
Ingredients
- Potatoes, peeled and cut into fry shapes
- Water, for soaking
- Salt (1 tsp per quart or 1/2 tsp per pint)
- Boiling water
Instructions
- Prepare the Potatoes: Start by peeling your potatoes and slicing them into uniform fry-shaped strips, ideally about 1/2 to 3/4 inch wide.
- Soak the Potatoes: Place the cut fries in a bowl of water to remove excess starch. Change the water three times and let them soak for around an hour each time.
- Pack the Jars: Sterilize your canning jars. In each quart jar, add 1 teaspoon of salt. If using pint jars, add 1/2 teaspoon instead. Pack the fries snugly into the jars, leaving about an inch of headspace.
- Fill with Boiling Water: Bring some water to a rolling boil, then carefully pour it over the fries in the jars, ensuring they are fully submerged.
- Pressure Can the French Fries: Process the jars at 10 pounds of pressure for 35 minutes for pint jars, or 40 minutes for quart jars.
- Label and Store: After cooling, check the seals and label the jars with the date. Store them in a cool, dark place.
- To Serve: When you’re ready to indulge, drain and rinse the fries from the jar. Fry them in hot oil until golden brown (about 7–10 minutes at 375°F), or bake in the oven at 425°F for 25–30 minutes, flipping halfway for a crispy finish.
Notes
Use starchy potatoes like Russets for best texture. Always follow safe pressure canning practices for low-acid foods.
- Prep Time: 2 hours
- Cook Time: 40 minutes
- Category: Preserving
- Method: Pressure Canning
- Cuisine: American
Nutrition
- Serving Size: 1/2 cup (drained)
- Calories: 90
- Sugar: 1g
- Sodium: 290mg
- Fat: 0g
- Saturated Fat: 0g
- Unsaturated Fat: 0g
- Trans Fat: 0g
- Carbohydrates: 21g
- Fiber: 2g
- Protein: 2g
- Cholesterol: 0mg
Keywords: canned french fries, pressure canning, homemade fries, potato preserving, pantry potatoes