How to Make DIY Aroma Stones: A Naturally Scented Craft for Every Home
There’s something truly magical about walking into a room filled with a gentle, natural fragrance. Instead of reaching for commercial air fresheners filled with synthetic chemicals, you can create your own DIY Aroma Stones using simple, household ingredients and essential oils. These charming little creations are not only functional but also serve as beautiful decorative pieces for your home, office, car, or drawers.
DIY Aroma Stones are an excellent craft for beginners and seasoned makers alike. They’re customizable, easy to make, and can be tailored to fit any scent preference or aesthetic style. Whether you want calming lavender for your bedroom or invigorating peppermint for your workspace, these aroma stones are a perfect solution.
In this article, we’ll walk you through the process of creating your own scent-filled stones while covering the benefits, expert tips, how they smell, and how to store them properly. You’ll also find FAQs and inspiration links to help you take this project even further.
Table of Contents
Ingredients
To make these DIY Aroma Stones, you will need:
- 1/2 cup baking soda
- 1/2 cup cornstarch
- 1/4 cup warm water
- 15–30 drops of your favorite essential oil (lavender, lemon, peppermint, eucalyptus, etc.)
- Optional: natural coloring (mica powder or a drop of food coloring)
- Silicone molds, cookie cutters, or ice cube trays
- Mixing bowl and spoon
- Parchment paper or drying tray
These ingredients are simple and safe, making them ideal for family-friendly crafting.
Instructions
Step 1: Mix the Base
Start by combining the baking soda and cornstarch in a mixing bowl. Slowly stir in the warm water until the mixture forms a thick, pliable dough. If the dough is too sticky, add a small amount of cornstarch until you reach a clay-like consistency. If you’d like to add color, mix in your natural coloring until the hue is even.
Step 2: Shape the Stones
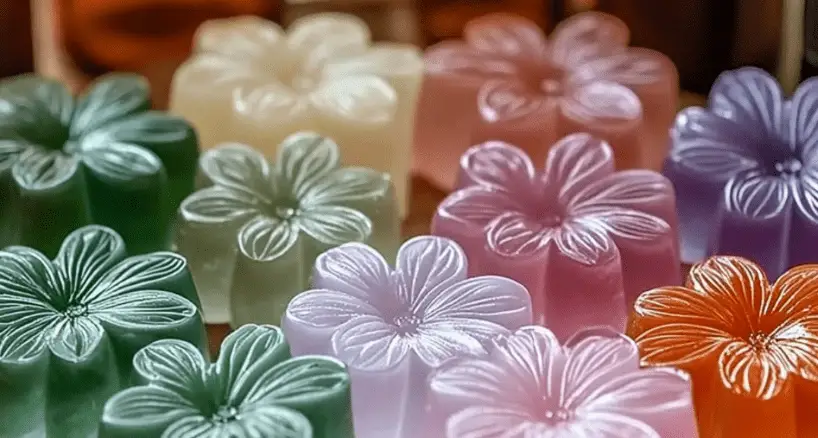
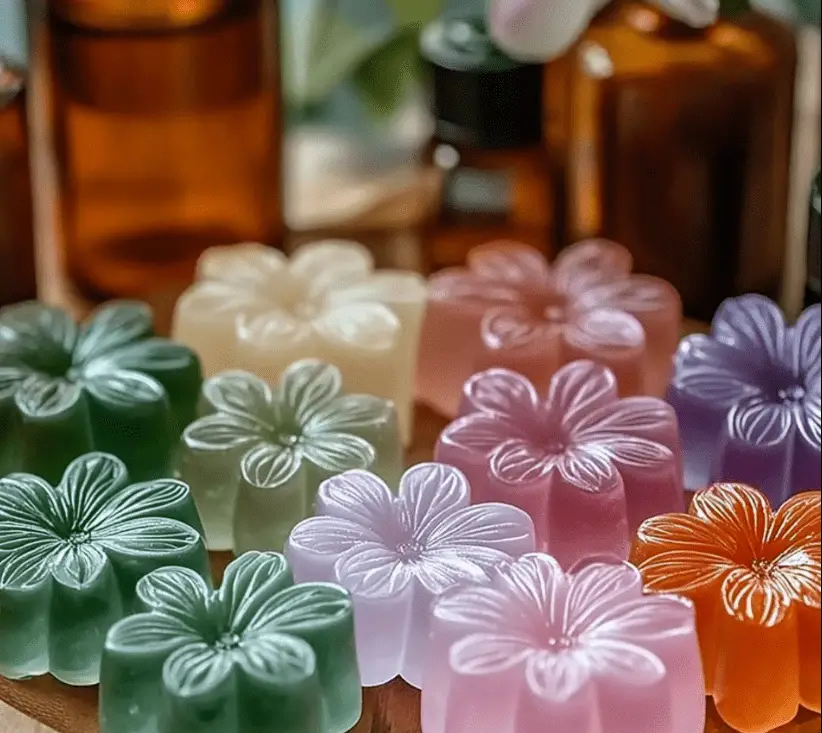
Using silicone molds, cookie cutters, or your hands, shape the dough into your desired forms. Smooth the edges for a clean finish. Once shaped, place the stones carefully on a piece of parchment paper or a drying tray.
Step 3: Dry the Stones
Allow the stones to air dry for 24 to 48 hours, flipping them halfway through to ensure even drying. They should be hard and fully dry before moving on to the next step.
Step 4: Add Scent
Once your aroma stones are fully dried, add 3 to 5 drops of essential oil to each stone. Let them sit for 1 to 2 hours to absorb the scent. Then, place them in jars, bowls, fabric sachets, or anywhere you’d like a burst of fragrance.
These homemade aroma stones not only smell amazing but also look beautiful when arranged creatively throughout your space.
Benefits of This Craft
Creating DIY Aroma Stones offers several practical and emotional benefits:
- Chemical-Free Freshness: Unlike synthetic air fresheners, aroma stones use natural essential oils, which are safer for both people and pets.
- Customizable Scents: Choose oils based on your needs—lavender for calm, citrus for energy, peppermint for focus, and more.
- Eco-Friendly: Reusable and long-lasting, these stones reduce waste and avoid plastic packaging.
- Budget-Friendly: Made with pantry staples, they’re far less expensive than store-bought diffusers or sprays.
- Great for Gifting: DIY aroma stones make thoughtful, handmade gifts for birthdays, holidays, or housewarmings.
- Creative Outlet: This project allows for artistic expression through shape, color, and scent combinations.
Tips
Here are some expert tips to help you get the most out of your aroma stone crafting:
- Use High-Quality Essential Oils: The better the oil, the longer and stronger the scent will last.
- Keep Your Dough Balanced: If it’s too dry, add a splash of water; too wet, add more cornstarch. Aim for a smooth, pliable texture.
- Let Them Dry Naturally: Avoid using heat or ovens to dry the stones, as this can cause cracking or warping.
- Store Oils Separately: To refresh your stones later, keep your favorite oils nearby and reapply a few drops when needed.
- Add Labels or Tags: If gifting or storing multiple scents, label them with a tag or color code to keep them organized.
What Do They Smell Like?
DIY Aroma Stones smell exactly how you want them to. Because they are infused with essential oils, the fragrance is fresh, clean, and completely under your control. Unlike artificial room sprays that often smell overpowering or chemical-laden, these stones release subtle and lasting aromas.
The scent depends on your oil choice. For example:
- Lavender: Calming, floral, and soothing—perfect for bedrooms or reading nooks.
- Peppermint: Crisp and refreshing—ideal for workspaces or cars.
- Lemon or Orange: Bright and energizing—great for kitchens and entryways.
- Eucalyptus: Clean and herbal—ideal for bathrooms or closets.
Over time, the scent will gradually fade, but you can easily refresh it by adding more essential oil as needed.
How to Store
Aroma stones are low maintenance, but proper storage will ensure they last a long time and remain effective:
- Cool, Dry Place: Store in a non-humid area to prevent softening or breakdown of the stone’s structure.
- Use Airtight Containers: For travel or gifting, store the stones in small mason jars, tins, or cloth sachets.
- Avoid Direct Sunlight: Prolonged exposure to heat or light can cause the essential oils to evaporate faster.
- Keep Essential Oils on Hand: Re-scent the stones every few weeks or when the aroma fades.
If stored properly, your aroma stones can be reused and refreshed indefinitely.
DIY Aroma Stones are a fun, accessible, and rewarding craft that turns simple ingredients into something beautiful and functional. Not only do they help create a calming, personalized atmosphere in your home, but they also make wonderful gifts and décor items.
If you love creative home projects, don’t miss out on exploring More DIY craft ideas for inspiration. From scented creations to seasonal decor, there’s always something new to try.
And for visual ideas and presentation inspiration, be sure to check Pinterest for handmade aroma stone designs. Seeing how others display and package their creations can spark even more creative ideas for your own projects.
FAQ
Can I use these stones in the bathroom?
Yes, aroma stones work wonderfully in small, enclosed spaces like bathrooms. Just make sure they’re kept away from direct water contact.
How long does the scent last?
The initial scent may last one to two weeks depending on the oil used and environmental conditions. You can refresh the scent by adding a few more drops as needed.
Can I mix essential oils?
Absolutely. Feel free to blend oils like lavender and lemon, or peppermint and eucalyptus, to create your own custom fragrances.
Is there a faster way to dry them?
Air-drying is the safest method. Using heat can lead to cracks or uneven texture.
Can kids help with this craft?
Yes, with adult supervision. It’s a fun and safe project for older kids, especially when selecting colors and molds.
What if my dough is too runny?
Add small amounts of cornstarch until it thickens to a workable consistency.