How to Make Easy Homemade Playdough: A Fun and Safe DIY Craft for Kids
Creating homemade playdough is one of the most rewarding and budget-friendly crafts you can do with kids. With just a few basic kitchen ingredients, you can whip up a batch of colorful, soft, and safe playdough perfect for endless imaginative play. Whether it’s a rainy day project, a birthday party activity, or simply a fun afternoon craft, this recipe turns simple materials into something magical. It’s an ideal way to keep children engaged, encourage creativity, and foster sensory development all at once.
Table of Contents
Ingredients
- 1 cup flour
- 1/2 cup salt
- 1/2 cup water
- 2 teaspoons vegetable oil
- 1/2 teaspoon food coloring
Instructions
- In a medium mixing bowl, combine the flour and salt.
- In a liquid measuring cup, measure out 1/2 cup of water and add your favorite food coloring to it.
- Pour the colored water into the flour mixture, along with the vegetable oil.
- Mix everything together, using your hands if you prefer, until the mixture reaches a playful dough consistency.
- If the dough feels a bit sticky, add flour a teaspoon at a time until you get that perfect, moldable texture.
Now you’re all set to create colorful shapes and figures. Enjoy mixing and matching colors with your little ones as their imagination takes the lead.
Benefits of This Craft
Making playdough at home provides more than just a fun crafting experience—it supports developmental growth in children. Here are some of the major benefits:
- Sensory development: The soft texture and squishy consistency of playdough engage the senses, helping children refine touch perception.
- Fine motor skills: Rolling, pinching, and shaping dough helps strengthen small hand muscles, improving coordination and dexterity.
- Creative thinking: Kids can create animals, food, letters, or abstract sculptures, boosting their imagination and storytelling abilities.
- Safe and customizable: This recipe uses simple, non-toxic ingredients. You can adjust color, scent, or texture to suit your child’s preferences or sensitivities.
- Calming and therapeutic: Molding dough can have a soothing effect, offering a quiet, focused activity for children dealing with anxiety or overstimulation.
Tips
To get the most out of your homemade playdough experience, consider the following helpful tips:
- Use gel food coloring for brighter, more vibrant colors that pop.
- Add essential oils like lavender or peppermint for a sensory twist, but use sparingly and with caution around younger children.
- Divide dough into small portions before adding color, so you can create multiple shades in one batch.
- Store in airtight containers to prevent the dough from drying out.
- Use kitchen tools like cookie cutters, rolling pins, and plastic utensils for added fun and fine motor skill development.
- Engage in themed play like making pretend bakery items, garden creatures, or alphabet letters to tie in educational activities.
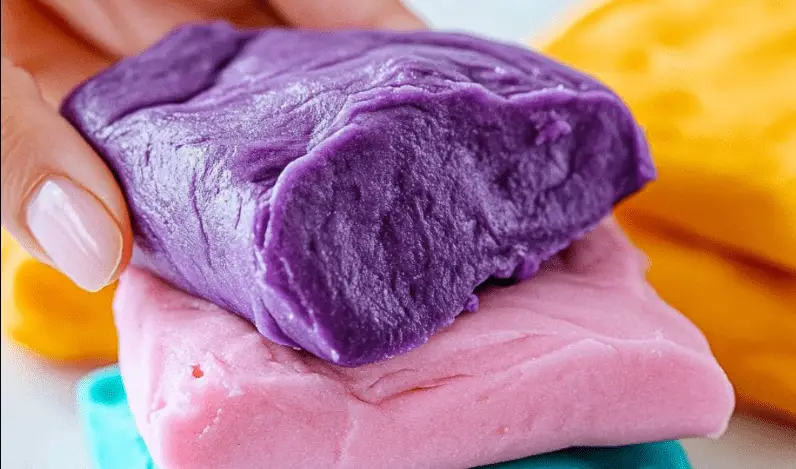
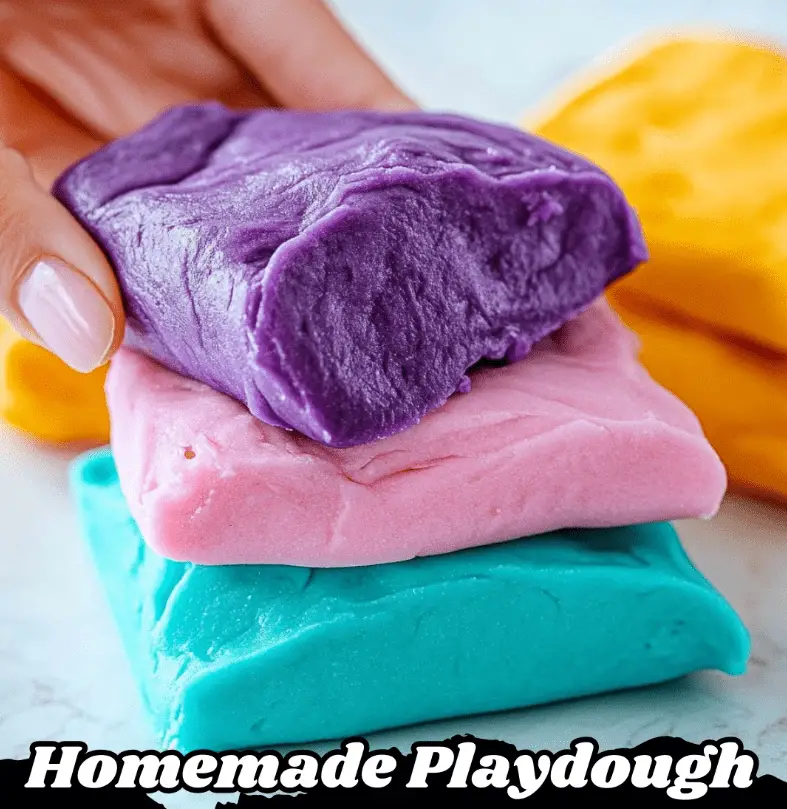
What Taste Look Like?
While this playdough recipe is made from edible ingredients, it is not intended for consumption. The high salt content gives it an extremely salty, unpalatable taste, which naturally discourages kids from eating it. That said, the texture is soft and pliable—ideal for molding, shaping, and creative play. Its look can range from soft pastels to bold, vibrant hues depending on the amount and type of food coloring you use. The final product is a smooth dough that’s firm enough to hold its shape, yet soft enough to squish and reform with ease.
How to Store
Proper storage ensures your homemade playdough lasts as long as possible without drying out or developing mold. Here’s how to keep it fresh:
- Place the playdough in an airtight container or sealable plastic bag immediately after playtime.
- Store in a cool, dry place away from direct sunlight.
- If the dough begins to dry out, add a few drops of water and knead it to bring back moisture.
- For longer shelf life, refrigerate the dough. Allow it to warm to room temperature before use.
- Always inspect the dough for any discoloration or odd smell before reuse, and discard if mold appears.
Homemade playdough is more than just a craft—it’s a gateway to hours of educational and imaginative fun. From sensory exploration and fine motor development to color mixing and creativity, this easy DIY activity offers multiple benefits with minimal cost. Making it together with children also provides quality bonding time, fostering communication and teamwork. Plus, you know exactly what’s in it, offering peace of mind for parents who want safer play options for their kids.
Ready to dive into more exciting, hands-on DIY fun? Be sure to check out More DIY craft ideas for creative projects you can try at home.
FAQ
Can I use gluten-free flour in this recipe?
Yes, you can substitute with gluten-free flour. Keep in mind that the texture might vary slightly, so adjust water and flour quantities as needed.
How long does homemade playdough last?
When stored properly in an airtight container, it can last up to 2 months. If refrigerated, it may last even longer.
Is this recipe safe for toddlers?
Yes, all ingredients are non-toxic. However, due to the high salt content, it’s not intended to be eaten. Always supervise young children during play.
Can I add glitter or scents to the dough?
Absolutely. You can add fine craft glitter or a few drops of child-safe essential oils during the mixing process for extra sparkle or fragrance.
Why is my dough sticky or dry?
Stickiness usually means there’s too much water—add a little flour. If it’s too dry, add water a few drops at a time while kneading.