Magical Sensory Bottles for Kids
Sensory play is one of the most powerful tools to support early childhood development. When combined with creative crafting, it becomes a delightful experience that stimulates a child’s mind, vision, and motor skills. Magical Sensory Bottles are a brilliant example of this. These easy-to-make, colorful bottles are not only visually captivating but also incredibly calming for infants and toddlers. Whether you’re a parent, caregiver, or teacher, this craft is an excellent way to blend learning and play.
This project transforms everyday household items into a mesmerizing sensory tool. Children love shaking the bottles, watching the glitter swirl, and discovering hidden shapes as they float and fall. With just a few ingredients and a little supervision, you can create a collection of magical sensory bottles that engage, soothe, and entertain.
Ingredients
To create your own sensory bottles at home, you’ll need the following supplies:
- Small plastic bottles
- Glitter in a variety of colors
- Plastic beads and other small shapes
- Food coloring
- Water
- Super glue
These items are budget-friendly, easy to find, and safe when used with adult supervision. You can find small plastic bottles at most dollar stores, or reuse mini water bottles from your recycling bin. The contents inside can be customized based on themes, colors, or textures for a truly personalized sensory experience.
Instructions
1. Sort your supplies by color
Begin by organizing your materials—glitter, beads, and small shapes—into color groups. This step helps set the tone for a visually cohesive bottle and makes the process smoother.
2. Fill with beads and glitter
Choose a color scheme or go random with your decorations. Add a handful of plastic beads and a pinch of glitter into the empty plastic bottle. You can mix multiple textures, such as stars, sequins, or foam shapes, to vary the sensory experience.
3. Add water
Slowly pour water into the bottle, filling it about 3/4 of the way. Leave some space at the top to prevent overflow when you add the final touches.
4. Color the water
Add a few drops of food coloring into the bottle and stir gently. This will tint the water and create a more dramatic visual effect. You can match the food coloring to your glitter and beads for a color-themed bottle.
5. Remove trapped bubbles
Tap the bottle gently on a hard surface to help trapped air bubbles rise to the top. This will help give the liquid a smooth, uninterrupted flow when the bottle is shaken.
6. Top off with water
If needed, add a little more water to fill the bottle almost completely. Leave a tiny air gap to allow the contents to move and swirl freely.
7. Seal the lid with glue
To ensure safety, apply a ring of super glue around the inside of the bottle cap. Screw the cap on tightly and press firmly. This keeps the contents securely sealed and avoids spills during play.
8. Let it dry
Place the bottles upright and let the glue dry fully before use. This step is important to prevent any leaks during handling.
9. Check for leaks
Once the glue is completely dry, give the bottle a gentle shake to make sure it’s sealed properly. If any water escapes, reapply glue and reseal.
10. Play and explore
Now your sensory bottles are ready to go. These can be placed in a basket for tummy time, used in circle time at preschool, or offered as a calming tool during overstimulation.
Benefits of This Craft
Creating and using magical sensory bottles comes with a wide range of benefits for young children:
- Supports visual tracking and focus
- Encourages color recognition and curiosity
- Promotes sensory exploration through movement and motion
- Offers calming stimulation and stress relief
- Teaches cause and effect (shaking creates movement)
- Provides a screen-free, hands-on activity
These bottles are also beneficial for children with sensory processing differences, as they provide visual feedback that is soothing and predictable. They’re a helpful addition to quiet corners in classrooms or therapy rooms.
Tips
- Use clear, durable bottles that are easy for small hands to grip
- Always supervise young children during use, especially those under three
- You can add clear hair gel or baby oil to the water for a slower-moving effect
- Label the bottom of each bottle with a theme or color for easier organization
- Use glitter glue instead of loose glitter for a thicker, more suspended look
Make this project even more engaging by letting older children choose their own color combinations or decorations. It’s a great opportunity to encourage creativity and independence.
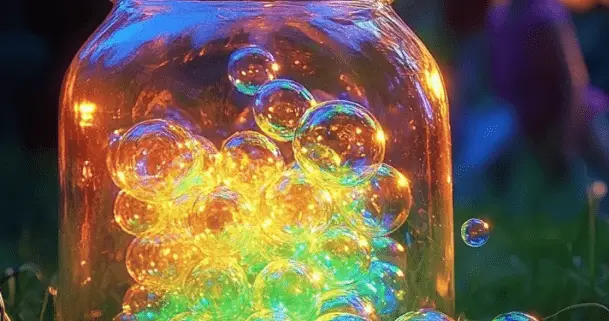
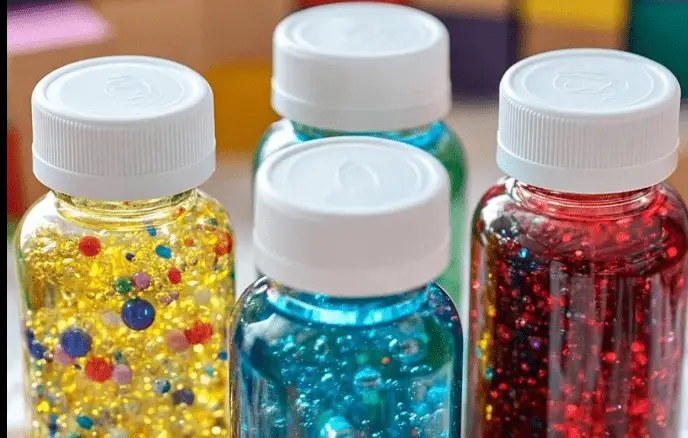
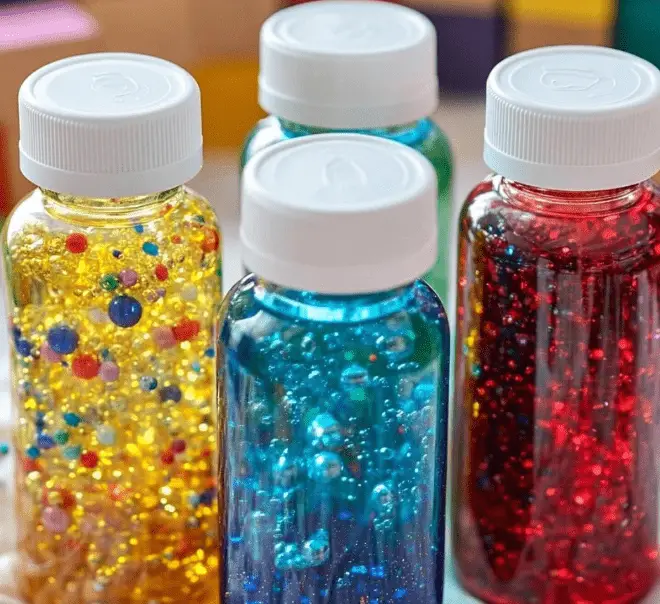
What Do Sensory Bottles Look Like?
Sensory bottles are vibrant, captivating, and beautiful to look at. The glitter shimmers and swirls as it floats through colored water, while beads drift slowly or sink depending on their density. The overall appearance is similar to a snow globe or lava lamp, but safer for play.
When shaken, the bottles transform into swirling storms of color and texture, capturing kids’ attention immediately. Once the motion slows, they become peaceful to observe and can help regulate emotions in overstimulated children.
How to Store
To keep your sensory bottles in top shape:
- Store them upright to avoid slow leakage from the lid
- Wipe them regularly with a damp cloth to keep them clean
- Keep them out of direct sunlight to prevent fading of the contents
- Place in a basket, shelf, or sensory bin for easy access
Avoid freezing or exposing the bottles to extreme heat, as this may cause the plastic to warp or the glue to loosen over time.
Conclusion
Magical Sensory Bottles are a fun, calming, and customizable craft that engages children of all ages. They’re easy to make, visually stunning, and offer a peaceful way to explore color, motion, and sound. Whether you’re introducing a new sensory tool at home, making gifts for a toddler playgroup, or building classroom resources, these bottles are always a hit.
They’re more than just a toy—they’re an experience. A swirl of glitter, a pop of color, and a moment of calm all in one bottle.
Looking for more fun crafts to keep the creativity flowing? Visit More DIY craft ideas and discover endless hands-on projects for kids and families.
FAQ
Can I use baby oil instead of water?
Yes, baby oil creates a thicker consistency and slows down movement, but it may be harder to clean if spilled.
Are sensory bottles safe for babies?
With adult supervision and sealed caps, yes. Always inspect for damage and never leave a child unattended with a bottle.
How long do sensory bottles last?
If sealed correctly and kept clean, they can last for many months or even years.
Can I reuse the bottles?
Yes, if you carefully remove the glue from the cap. However, reusing may reduce the seal’s effectiveness.
Can I use different fillings like rice or sand?
Absolutely. Dry sensory bottles using sand, rice, or pasta also provide great visual and tactile engagement.