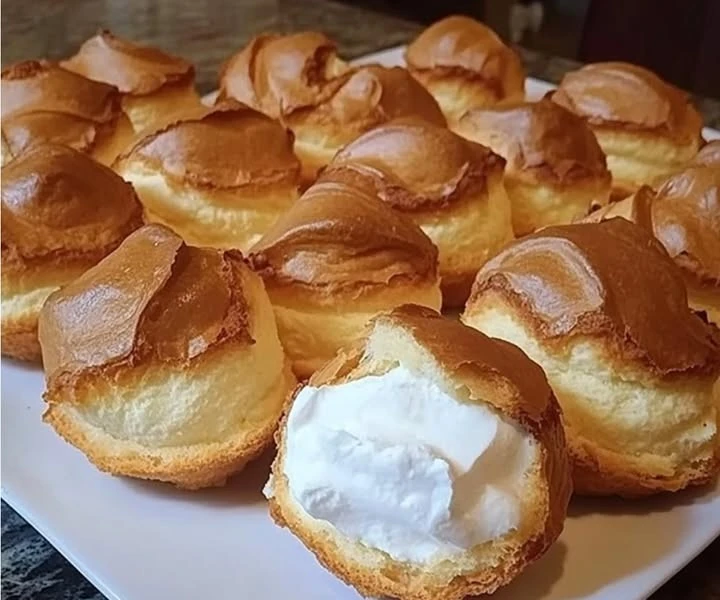
Mom’s Famous Cream Puffs
Cream puffs are one of those delightful treats that can brighten any day. Fluffy, light, and filled with creamy goodness, they are a dessert that is loved by many. Mom’s Famous Cream Puffs have a special place in our hearts and homes. Whether you are celebrating a special occasion or just want a sweet snack, these cream puffs are always a hit. This article will guide you through the process of making these amazing cream puffs, from start to finish.
Why You Will Love This Recipe
There are many reasons to love Mom’s Famous Cream Puffs. First, they are incredibly easy to make. Even if you are not a baking expert, you can still create these delicious treats. Second, they are super versatile. You can fill them with various creams, custards, or even fruit. Third, they look impressive! When you serve them at a party, your friends and family will think you are a professional baker. Finally, they taste amazing! The soft pastry shell combined with a rich filling is truly irresistible.
How to Prepare Mom’s Famous Cream Puffs
Making Mom’s Famous Cream Puffs is a fun and rewarding experience. With just a few simple ingredients and steps, you can create a treat that everyone will love.
Ingredients:
- 1 cup of water
- 1/2 cup of unsalted butter
- 1 cup of all-purpose flour
- 1/4 teaspoon of salt
- 4 large eggs
- 1 cup of heavy whipping cream
- 1/4 cup of powdered sugar
- 1 teaspoon of vanilla extract
Instructions:
- Preheat Your Oven: Start by preheating your oven to 425°F (220°C). This will help the puffs rise and become golden brown.
- Prepare the Dough: In a medium saucepan, combine the water and butter. Heat over medium heat until the butter melts. Once it is melted, add the flour and salt all at once, stirring quickly. Continue stirring until the mixture forms a ball and leaves the sides of the pan.
- Cool the Mixture: Remove the saucepan from the heat and let the mixture cool for about 5 minutes. This step is important; it allows the dough to cool slightly before adding the eggs.
- Add Eggs: Once the dough has cooled, add the eggs one at a time, mixing well after each addition. The dough should be smooth and glossy.
- Shape the Puffs: Using a spoon or a piping bag, drop tablespoon-sized portions of dough onto a baking sheet lined with parchment paper. Make sure to leave space between each puff as they will expand while baking.
- Bake: Place the baking sheet in the preheated oven. Bake for about 20-25 minutes or until the puffs are golden brown and puffed up. Avoid opening the oven during baking, as this can cause the puffs to collapse.
- Cool: Once baked, remove the puffs from the oven and let them cool completely on a wire rack.
- Prepare the Filling: While the puffs are cooling, whip the heavy cream with powdered sugar and vanilla extract in a mixing bowl until stiff peaks form.
- Fill the Puffs: Once the puffs are cool, carefully cut a small slit in the side of each puff. Use a piping bag or a spoon to fill each puff with the whipped cream mixture.
- Serve: Dust with additional powdered sugar on top, if desired, and enjoy!
How to Serve Mom’s Famous Cream Puffs
These cream puffs are best served fresh. You can arrange them on a nice platter for parties or gatherings. If you want to make them extra special, you can drizzle some chocolate sauce over them or sprinkle with cocoa powder for a decorative touch. They also pair well with coffee or tea, making them perfect for afternoon snacks. For a festive touch, you can even add fruit filling or a flavored cream to set the mood for a particular season or holiday.
How to Store Mom’s Famous Cream Puffs
If you happen to have any leftover cream puffs (which is rare!), you can store them. Place the filled cream puffs in an airtight container and keep them in the refrigerator. They are best eaten within 1-2 days for the freshest taste and texture. If you want to prepare the puffs in advance, you can freeze the unfilled baked shells. Just make sure to cool them completely before placing them in a freezer bag. When ready to enjoy them, simply thaw and fill them with cream.
Tips for Preparing Mom’s Famous Cream Puffs
- Use Fresh Ingredients: Fresh ingredients can make a big difference in the flavor and texture of your cream puffs, so use fresh eggs and butter.
- Don’t Open the Oven: Avoid opening the oven door while the puffs are baking. This can cause them to deflate.
- Experiment with Fillings: Feel free to get creative with your fillings. Try different flavored whipped creams, custards, or even fruit.
- Piping Tips: If you are using a piping bag, choose a large round tip for easy filling of the puffs.
Variation
While Mom’s Famous Cream Puffs are delicious as they are, there are also many ways to enjoy them. Here are some fun variations you might consider:
- Chocolate Cream Puffs: Add cocoa powder to the whipped cream for a chocolate version.
- Fruit-Filled Puffs: Instead of whipped cream, use pastry cream and add fresh fruit for a refreshing twist.
- Savory Puffs: You can make a savory version by filling the puffs with cream cheese and herbs or even a savory chicken salad.
Frequently Asked Questions
1. Can I make the cream puffs in advance?
You can prepare the puffs ahead of time. Just bake them and store the unfilled shells in an airtight container. Fill them with cream just before serving to keep them fresh.
2. Why did my cream puffs not rise?
If the cream puffs do not rise, it may be due to opening the oven door too early or not baking them long enough. Ensure to follow the baking time and avoid peeking!
3. Can I freeze cream puffs?
Yes, you can freeze the unfilled cream puffs. Just ensure they are completely cooled and stored in a freezer-safe bag. When ready to serve, thaw and fill them fresh.
Mom’s Famous Cream Puffs are a beloved treat that can make any gathering special. With this easy-to-follow recipe, you’ll be able to create these delightful snacks that everyone will enjoy. So, roll up your sleeves, gather your ingredients, and let’s start baking! Enjoy the sweet moments and smiles that come with every delicious bite.