Pressed Flower Stained Glass Craft: Bring Nature Indoors with Beauty and Color
Creating a Pressed Flower Stained Glass piece is a delightful way to capture the fleeting beauty of flowers and turn them into a year-round decoration. This simple DIY project blends natural elements with vibrant color and light, adding a magical and botanical charm to your home. Perfect for kids and adults alike, this craft is not only budget-friendly but also a wonderful way to reuse materials you already have. Whether displayed in a sunny window or gifted to a loved one, this pressed flower craft adds a soft, elegant touch to any room.
Table of Contents
Ingredients
To create this beautiful pressed flower stained glass craft, you will need:
- Fresh flowers
- Wax paper
- Crayon shavings
- Iron
- A frame of your choice (floating frame, embroidery hoop, or homemade Popsicle frame)
Instructions
1. Press the Flowers
Begin by pressing your flowers. Place them between two sheets of absorbent paper and then weigh them down with heavy items like a stack of books. Allow them to press for two to three weeks. Avoid using paper towels with texture as they can imprint on the petals. For optimal results, consider changing the absorbent paper after the first week.
2. Prepare the Wax Paper
Once the flowers are fully dried and pressed, cut two sheets of wax paper to match the size of your chosen frame.
3. Arrange the Flowers and Crayon Shavings
Lay one sheet of wax paper flat and arrange your pressed flowers on top. Sprinkle crayon shavings over the flowers, distributing the colors as you like.
4. Seal and Iron the Wax Paper
Place the second sheet of wax paper carefully on top of the first. Preheat your iron to medium (ensure steam is off) and gently iron the top layer. The heat will melt the crayon shavings, bonding the wax paper and creating a stunning stained glass effect.
5. Cool and Frame
Allow the wax paper to cool completely. Then place your artwork in your selected frame. Display it in a sunny window to let the light shine through and enhance the vibrant flower colors.
Benefits of This Craft
This craft provides numerous creative and developmental benefits:
- Educational: Ideal for teaching children about plant species and the natural drying process.
- Artistic Expression: Encourages creativity in arranging colors and shapes.
- Eco-Friendly: Makes use of leftover flowers and broken crayons.
- Therapeutic: The pressing and assembling process is calming and satisfying.
- Decorative: The final piece becomes a unique and beautiful home accent that changes with the sunlight.
Crafts like these promote mindfulness and a deeper appreciation for nature. They also offer a screen-free activity that’s enjoyable solo or as a family project.
Tips
- Flower Selection: Choose flowers with flat petals and vivid colors such as pansies, daisies, or ferns. Avoid overly thick or juicy blooms.
- Use a Cheese Grater: For easy crayon shavings, a handheld cheese grater works well. Choose bright or pastel crayons to enhance the stained glass look.
- Frame Options: If you don’t have a store-bought frame, make your own using Popsicle sticks glued into a square or circle, then add string for hanging.
- Keep It Balanced: Don’t overcrowd the wax paper. Allow space between flowers so that light can shine through and create contrast.
- Iron with Care: Use parchment paper between your iron and wax paper to prevent mess. Avoid moving the iron around too much—press down evenly.
What Does It Look and Feel Like?
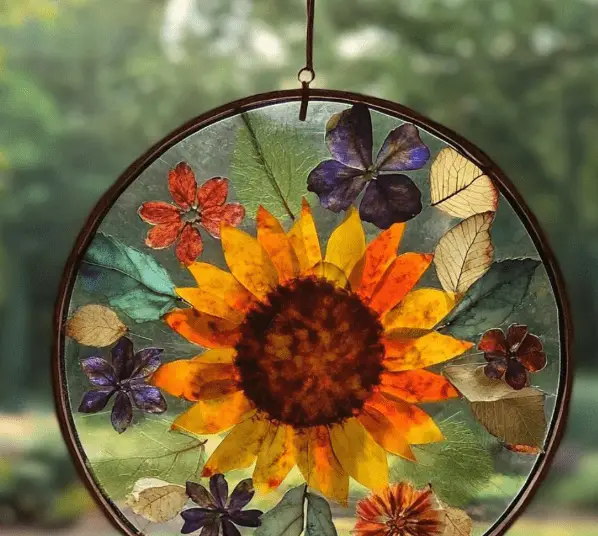
The finished Pressed Flower Stained Glass project has a translucent, colorful effect that mimics stained glass windows. When sunlight filters through the wax paper, the colors glow softly, highlighting the flower shapes and melted crayon patterns. It feels slightly textured to the touch and has a flexible yet firm structure once cooled. The blend of natural and waxy textures creates an elegant contrast, ideal for hanging in windows or even framing on a wall for display.
How to Store
To preserve your creation:
- Avoid Moisture: Keep it away from humid areas like bathrooms to prevent the wax from softening or the flowers from molding.
- Store Flat: If you’re not displaying it, store the artwork flat between sheets of clean cardboard or in a portfolio to prevent warping.
- Keep Out of Direct Heat: Avoid placing it in direct contact with heat sources such as radiators or sunny windowsills for long periods.
- Dust Gently: If framed, clean with a soft cloth to keep the wax surface clear and vibrant.
Proper care ensures your pressed flower art stays beautiful for many months or even years.
The Pressed Flower Stained Glass craft is a stunning, easy-to-make project that combines the elegance of nature with the fun of crafting. It’s a perfect blend of creativity, learning, and beauty, making it a great choice for family activities or seasonal home décor. This craft encourages sustainable use of natural materials while offering an artistic outlet that anyone can enjoy. With just a few tools and some patience, you can transform fresh blooms into a lasting window decoration that brings joy and light into your space.
For more creative projects like this one, explore our More DIY craft ideas and discover endless inspiration for your next artistic endeavor.
FAQ
Can I use artificial flowers instead of real ones?
This project works best with real pressed flowers. Artificial flowers won’t flatten or bond with wax paper the same way, and they won’t achieve the same stained glass effect.
What if I don’t have an iron?
You can try using a hair straightener carefully over parchment paper for smaller sections, but an iron gives the most even results.
Do I have to use crayon shavings?
Crayon shavings add color and help bond the wax paper. You can skip them for a more natural look, but the result may not have the same stained glass effect.
How long do the pressed flowers last?
If stored and displayed properly, pressed flowers in wax paper can maintain their color and structure for several months to over a year.
Can kids do this craft alone?
Children can help with flower picking, arranging, and crayon shaving. However, an adult should handle the ironing for safety.